Accounts
Account planning enables you to:
- Identify the accounts that offer the best opportunities for additional revenue
- Collaborate and communicate with your account team and your customers
- Assess the accurate health of any account relationship and identify customers at risk
- Build customer loyalty by aligning your resources and solutions with key customer strategies and initiatives
- Save time by automatically aggregating account research and social media content
- Create consistency in your team's execution while adapting to specific customer needs
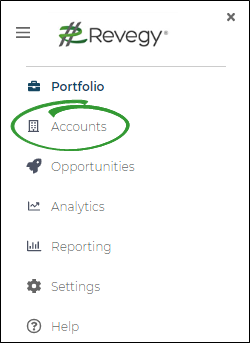
You can access the main account list at any time through the left collapsible sidebar in Revegy (standalone).
- Expand the left sidebar.
-
Click Accounts. The main account list opens.
An example of the account list is below.
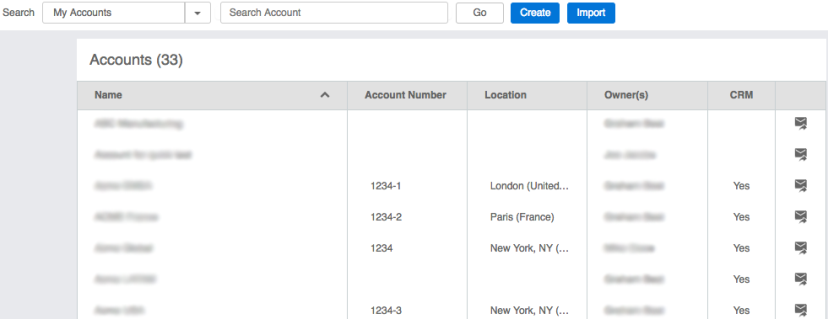
- Name: Name of the account
- Account Number: Number of the account
- Location: Location of the account
- Owner(s): Primary owner and team members with "owner" permission
- CRM: Indicates if the account is integrated with your CRM
- Email Icon (
 ): Allows you to email the account owners to request access
Search
Click the Search drop down to narrow the results.
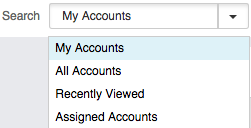
- My Accounts: Displays records that you own. You may see more records than you own if you have administrative user group permissions of "Owner" or "Both," which are typically reserved for managers and administrators.
- All Accounts: Displays all records based on your search criteria. Enter % as wildcard characters or %% to display all records that have been created for your user groups. You may have to request access to view the record from the owner using the email icon ().
- Recently Viewed: Displays your recently viewed records
- Assigned Accounts: Displays all records that you own or are listed as a team member
Sort
Click on any column header to sort the list by descending or ascending order.
If you receive a notice that you do not have access to an account, you may send an email to the owner(s) to request access.
In the main account list, click the email icon (). Your default mail application opens with a preset email to the owner(s). If you are allowed access to the account, then the owner(s) should add you as a team member.
For additional information about team members, please see the Team Members topic.
-
Open a new account profile.
- Click Create from the main account list.
-
Expand the left sidebar (Revegy standalone) then click Create New.
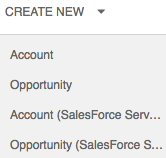
- Clicking Account will bring up the "Account Profile" pop-up.
-
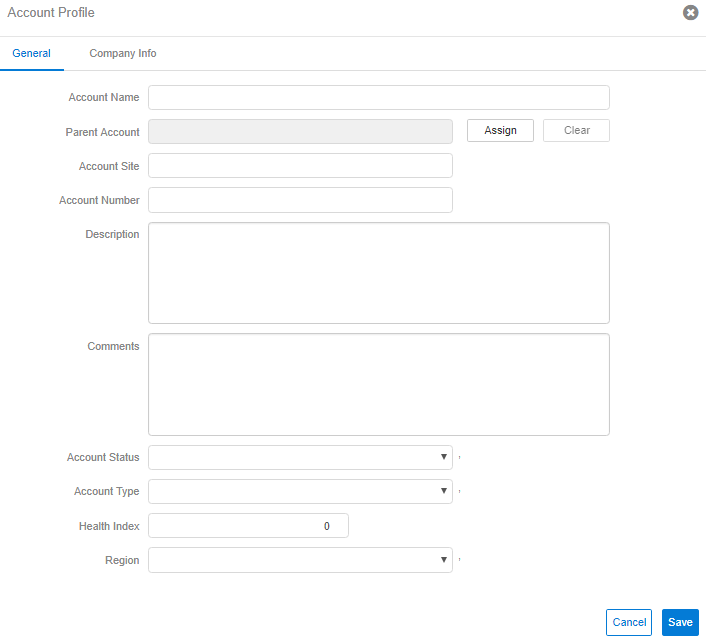
Enter account details, such as Account Name, Account Site, and Description, in the "General" tab of the Account Profile.
-
(optional) Assign a parent account to the profile.
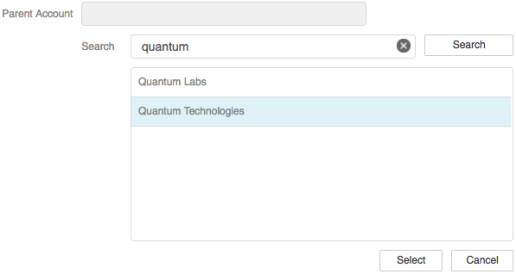
- Click Assign.
- Search for an account.
- Select account in the list.
- Click Select.
- (optional) Click Clear to remove the parent account or Assign to reassign it.
-
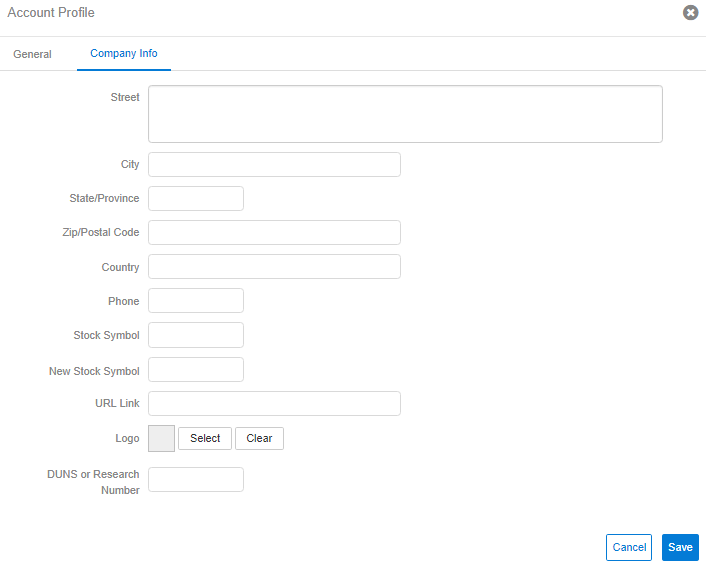
Click the "Company Info" tab, and enter additional details about the company.
-
(Optional) Upload a company logo to the account.
- Click Select.
- Browse to the company logo, and select it.
- Click Open. The logo is added to the profile.
- (Optional) Click Clear to remove the logo or Select to change it.

Note: Supported file types for logos are: JPEG, PNG, and GIF. Size limit for logos may not exceed 10 kb. - Click Save. The account is created and the dashboard opens. The creator of the account is the primary owner unless reassigned.
If Revegy is integrated with a CRM, but you access Revegy from the web application outside of your CRM (Revegy standalone), then you may import CRM accounts into Revegy that may not already be integrated.
-
Open the "Import Account from [CRM]" pop-up.
- Click Import from the main account list.
-
Expand the left sidebar (standalone), click Create New, then click Account (CRM).
-
Search for an existing CRM account, and select it in the list. You can search "%%" to return all accounts.
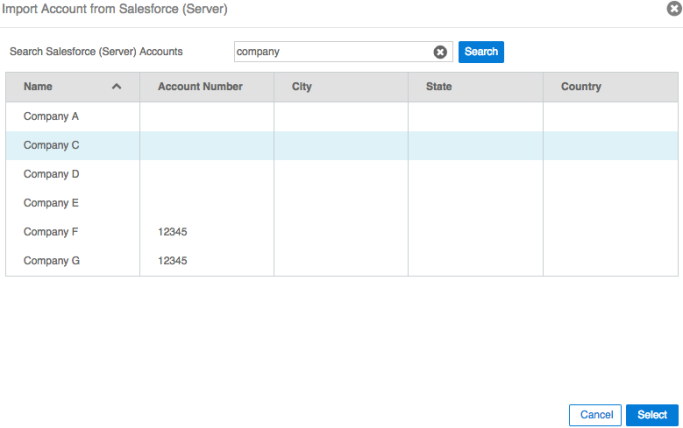
- Click Select. The account is imported into Revegy.
You can open an existing account by:
- Clicking the account name in the main account list.
- Clicking the account name from the "Recent" list in the left sidebar (Revegy standalone).
- Globally search for the account name using the magnifying glass in the top right corner, then click the account name.
Certain profile fields may be linked to playbooks depending on your company's system configuration. Updating linked fields may cause certain playbooks to become available or unavailable and may affect visibility of criteria within a linked playbook.
- Open an existing account.
-
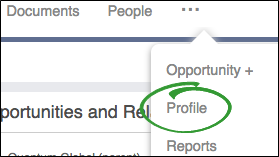
Hover over the "more" icon in the top toolbar, then click Profile.
- Click Edit on the "Account Profile" pop-up.
-
Update account details, such as name, site, and description, in the "General" tab of the account profile.
-
(optional) Assign a parent account to the profile.
- Click Assign.
- Search for an account.
- Select account in the list.
- Click Select.
- (optional) Click Clear to remove the parent account or Assign to reassign it.
-
Click the "Company Info" tab, and enter additional details about the company.
- Click Save.
Assigning a parent account to another account or opportunity creates a link between records that allows users to easily navigate between them. Parent accounts may also display child and related records in some reports, and display in plan object lists.
You have the ability to customize your dashboard, or overview page, with widgets that provide you with a quick glance of your account information. Several available widgets allow you to edit information directly from your dashboard.
-
Open Settings.
-
(standalone) Expand the left sidebar.
-
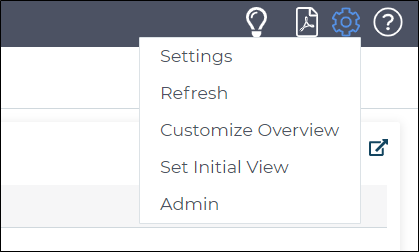
(embedded) Hover over the gear icon in the top right Revegy.
-
-
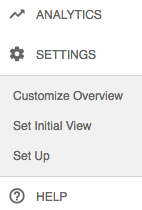
Click Customize Overview. The "Customize Account Overview" pop-up opens.
Note: If this option is unavailable, then a Revegy administrator has your dashboard locked, and it cannot be updated. -
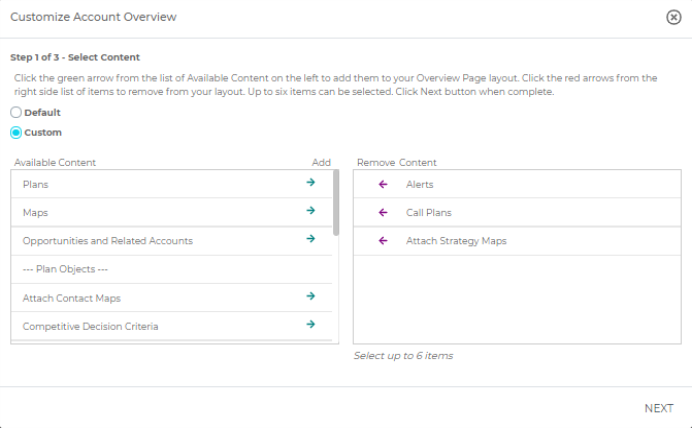
Complete "Step 1 of 3 - Select Content," then click Next.
- Select "Blank" to clear all widgets from the dashboard, or select "Custom" to add widgets.
- (Custom only) Use the green arrows in the "Add" column to add one to six widgets. Use the purple arrows in the "Remove" column to remove widgets.
-
(Custom only) Complete "Step 2 of 3 - Select Layout" by selecting a layout for your widgets, then click Next.

-
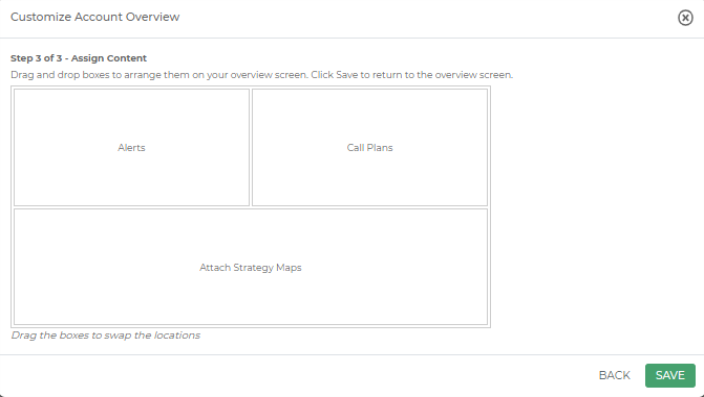
(Custom only) Complete "Step 3 of 3 - Assign Content" by dragging and dropping widget titles to the desired location within your selected layout.
-
Click Save. The dashboard reloads with the changes in place.
|
|
Note: To select a plan object to include in the Overview, the Reusability option of the plan object must be set as "Account" or "Opportunity." |
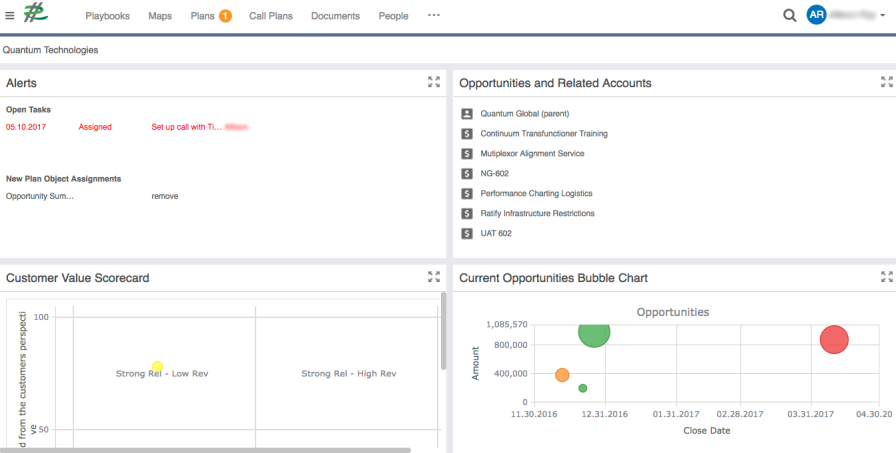
Widgets are placed on your dashboard to allow you quick access to information most important to you.
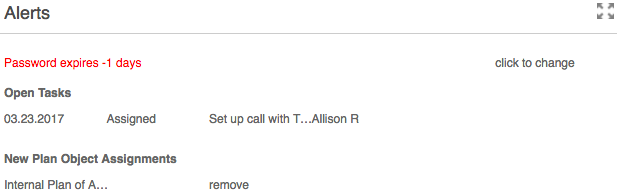
Alerts widget
The alerts widget displays:
- Open tasks
- Scheduled calls (open call plans)
- When specific plan objects are assigned to you
- If your password is expiring soon
Click each task to open the specific plan object. Click "remove" for plan object assignments to remove the alert from the widget. Your permissions are not changed.
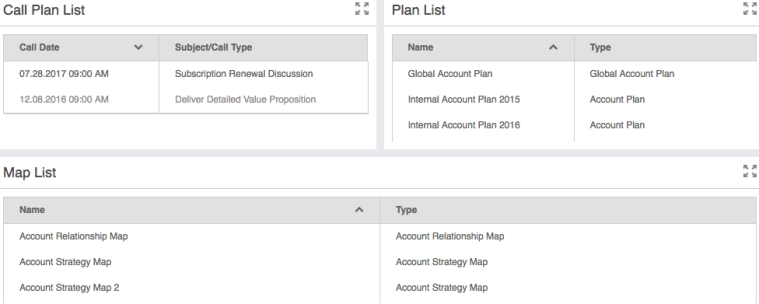
Map, plan, and call plan list widgets
The Call Plan List , Plan List, and Map List widgets display a list of all account Maps, Plans, and Call Plans. Click each tool to open it.
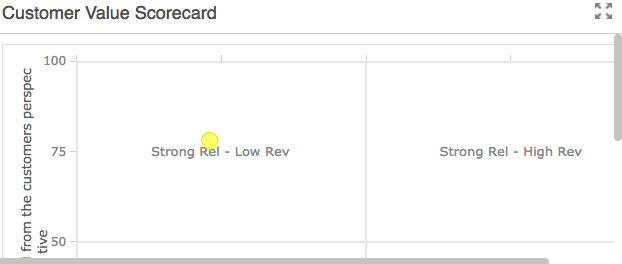
Grids/Scorecards widget
The Grids/ Scorecards widget allows to you select a specific grid or scorecard configuration and edit the details directly from your dashboard. If you select an opportunity grid or scorecard, then the widget summarizes the scores for all matching grids or scorecards on the opportunity level.
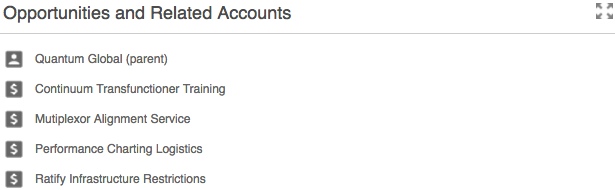
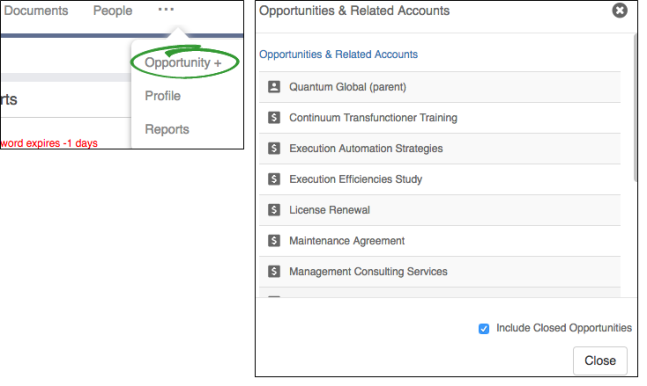
Opportunities and Related Accounts widget
The Opportunities and Related Accounts widget provides a quick-access list to all related accounts and child opportunities for the currently open account. The parent account is identified by "(parent)". Click a record to open it.
You have the ability to set an initial view that opens first when you open your account dashboard. You may set the initial view to open directly to a playbook, map, or a plan. These tools may be edited from this view.
-
Open Settings.
-
(standalone) Expand the left sidebar.
-
(embedded) Hover over the gear icon in the top right Revegy.
-
-
Click Set Initial View. The "Set Initial Account View" pop-up opens.
Note: If this option is unavailable, then a Revegy administrator has your dashboard locked, and it cannot be updated. -
Select "Playbook," "Map," or "Plan."
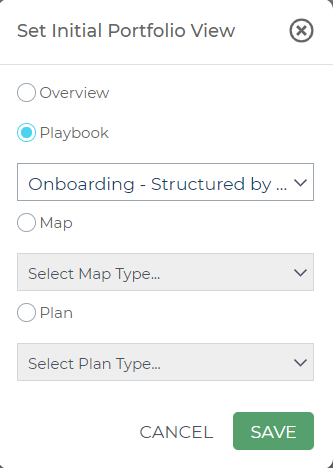
- Select a specific playbook, map, or plan to open whenever you initially open your account dashboard. If you select a tool that has not been created yet, the tool is created when you save.
-
Click Save. The selected tool is opened next time you open the account.

Select the account name to return to your widget dashboard. To reset the initial view to your widget dashboard, select "Overview" in the "Set Initial Account View" pop-up.
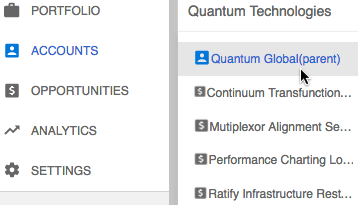
There are several ways to open related accounts and child opportunities.
-
Expand the left sidebar (standalone), hover over Accounts, then click a related record name to open it.
-
Click a related record name from the "Opportunities and Related Accounts" dashboard widget.
-
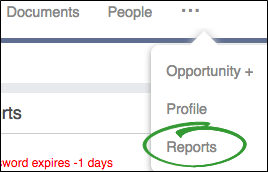
Hover over the "more (...)" icon in the top toolbar on the overview dashboard.
-
Click Opportunity + then click a related record name to open it.
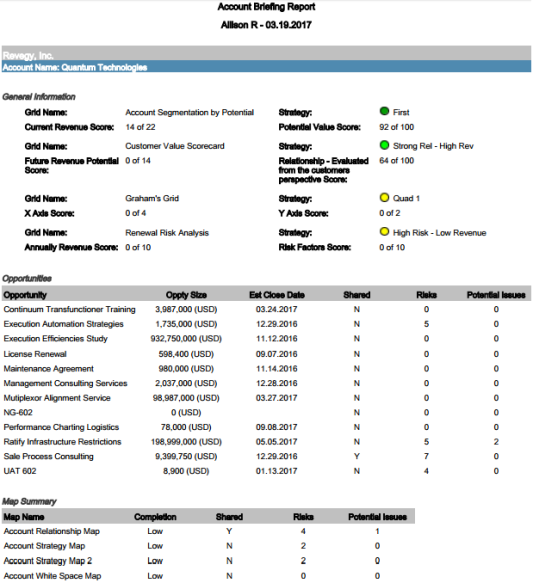
The briefing report enable you to get all the consolidated account information that has been populated into various Revegy tools in one report.
The briefing report may include the following information:
- Summaries of general account information, status, and the opportunities relating to an account
- Summaries of any risks and potential issues on maps
- Account plan information
- Map information (Examples: influence, strategy, and white space maps)
- Coaching report that details the risks and potential issues
- Active playbook (if one is set)
-
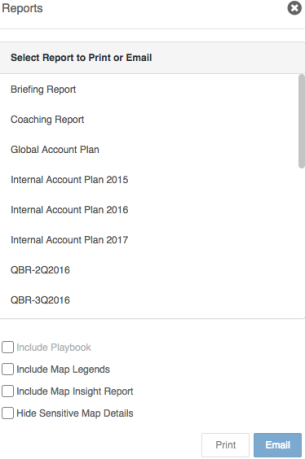
Open the "Reports" pop-up.
-
(standalone) Hover over the "more" icon in the top toolbar, then click Reports.
-
(embedded) Click the report icon in the top right Revegy.

-
-
Click Briefing Report in the "Reports" pop-up.
-
(optional) Select to include any or all of the supplementary pieces.
Option Details Include Map Legends Includes the map legends for maps that are included Include Map Insight Report Displays map attributes for each contact that has been added to any contact map for the selected record
Include Sensitive Map Details Hides all information on maps marked as "sensitive" -
Click Print or Email.
- Print: The briefing report opens as a PDF.
- Email: Your default email application opens and attaches a link to a PDF download of the report in a new email.
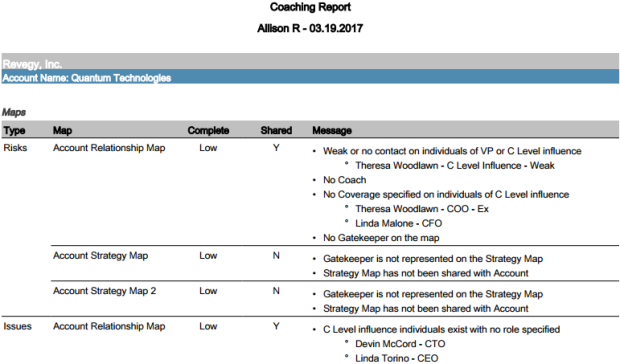
The coaching report indicates details of potential risks and issues based on the information entered on the maps. Coaching reports also appear at the end of briefing reports. Revegy administrators determine the type of information that displays in coaching reports, and the data for the reports is pulled from the account maps.
-
Open the "Reports" pop-up.
-
(standalone) Hover over the "more" icon in the top toolbar, then click Reports.
-
(embedded) Click the Report icon in the top right Revegy.
-
-
Click Coaching Report in the "Reports" pop-up.
-
(optional) Select to include any or all of the supplementary pieces.
Option Details Include Map Legends Includes the map legends for maps that are included Include Map Insight Report Displays map attributes for each contact that has been added to any contact map for the selected record
Include Sensitive Map Details Hides all information on maps marked as "sensitive" -
Click Print or Email.
- Print: The Coaching Report opens as a PDF.
- Email: Your default email application opens and attaches a link to a PDF download of the report in a new email.
Account plan and map reports provide a copy of the selected plan, map, or map list.
-
Open the "Reports" pop-up.
-
(standalone) Hover over the "more" icon in the top toolbar, then click Reports.
-
(embedded) Click the report icon in the top right Revegy.
-
-
Click a plan, map, or map list in the "Reports" pop-up.
-
(optional) Select to include any or all of the supplementary pieces.
Option Details Include Playbook (plan reports only) Includes the active playbook if one is set Include Map Legends Includes the map legends for maps that are included Include Map Insight Report Displays map attributes for each contact that has been added to any contact map for the selected record
Include Sensitive Map Details Hides all information on maps marked as "sensitive" -
Click Print or Email.
- Print: The report opens as a PDF.
- Email: Your default email application opens and attaches a link to a PDF download of the report in a new email.