Playbooks
Playbooks:
- Provide a visual and interactive method of following repeatable processes
- Are made up of stages, milestones, and items (activities and verifiable outcomes)
- Allow you to deliver the right resources at the right time
- Support any process, including inside sales, account planning, channel planning, demand generation, and renewals
- Improve sales team efficiency by focusing on high-value activities
- Clearly see and define the best next steps in your account planning and sales processes
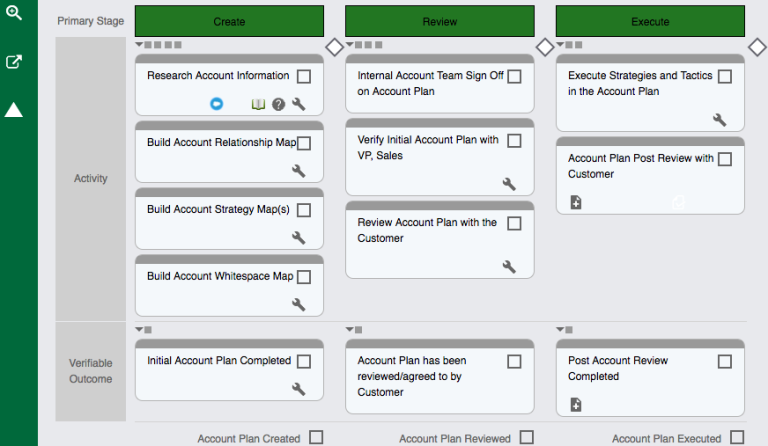
For account planning
- Improve account relationships by knowing the next steps in aligning your resources with key customer strategies and initiatives.
- Ensure planning, execution, and account reviews are done in a timely fashion.
- Access the right supporting material at the right time without searching.
- Collaborate and communicate effectively with your team about where you are in the account management process.
- Account playbooks are not commonly shared with your customers.
For opportunity planning
- Use opportunity playbooks to improve your efficiency and know the next steps in a successful opportunity. This knowledge guides you to closing deals faster and gaining more opportunities.
- Identify potential holes in your deal.
- Access the right supporting material at the right time without searching.
- Bring managers and team members up to speed of where you are in an opportunity.
- Use opportunity playbooks throughout the entire sell process and to drive all activities.
- Use playbooks during deal reviews to communicate to your team where you are in the sales process.
- Opportunity playbooks are not commonly shared with your customers, but they may be used to communicate the process that a successful purchase typically goes through with your customer. You may also use opportunity playbooks to challenge customers if they do not prove that they have verified the verifiable outcomes in a playbook.
- Navigate to portfolio/territory, an account, opportunity, or partner.
-
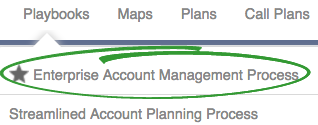
Hover over the "Playbooks" drop down list from the main top navigation menu, and click any playbook. The playbook with a star is the active playbook.
|
|
Note: Playbook availability may change depending on responses entered in the record profile. The criteria for this is determined by Revegy administrators. |
Set the active playbook
Setting a playbook as active indicates that it is the playbook currently in use. The active playbook displays first and with a star in the playbook drop down menu.
- Click the Settings icon (
 ) in the left side menu of an open playbook.
 -
Select "Set as Active." A star next to the playbook name indicates the active playbook.


Change the active playbook
To change the active playbook, open the new playbook, then follow steps 1-2 for setting an active playbook. A confirmation prompt appears before the active playbook is changed.

You are also prompted before editing a playbook that is not set as active. If you click "No," you are still allowed to edit the playbook.
- Click the Zoom icon (
 ) in the left side menu of an open playbook.
 -
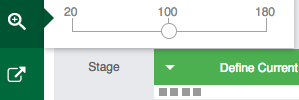
Drag the dot along the scale to zoom in and out. The playbook scale is between 20-180%.
For divided sections
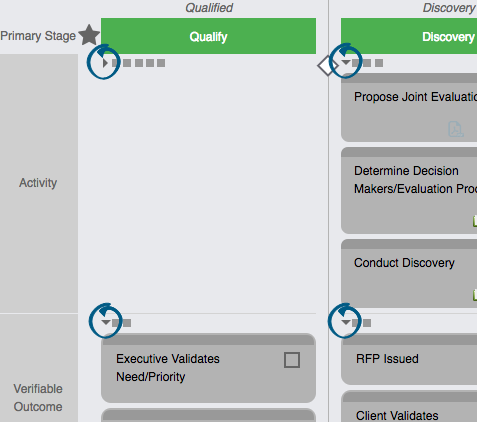
If the playbook stages are divided into sections by item, then use the arrow indicators at the top of each section to expand and collapse them.
For single lists
If the items for each playbook stage are in a single list, then use the arrow indicator on each primary stage to expand and collapse each stage.

For nested items
If items are nested, then use the arrow indicators above the nested items to expand and collapse them.
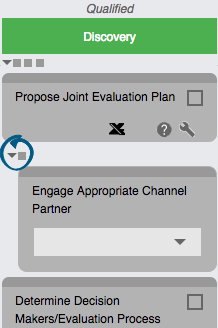
For opportunity playbooks
Past and future stages of opportunity playbooks may configured to automatically hide without the option of expanding or collapsing. Only the current stage may be expanded or collapsed.

Checkboxes
Select the checkbox to mark an item as complete or deselect an item to mark it as incomplete.

Items with checkboxes may have scores attached to them to indicate the completeness of stages. As you complete these items, your journey through the playbook progresses.
Radio buttons
Select the radio buttons to indicate the progress of the item.
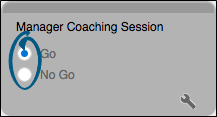
Items with radio buttons may have scores attached to them to indicate the completeness of stages. As you complete these items, your journey through the playbook progresses.
Drop down lists
Select an option from the drop down list to indicate the progress of the item.
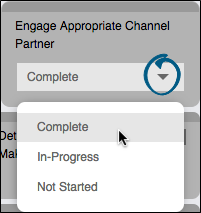
Items with drop down lists may have scores attached to them to indicate the completeness of stages. As you complete these items, your journey through the playbook progresses.
No options
Some playbook items may not have any options to select. These items may represent steps through your journey that do not have specific actions for you to complete.

Items with no options to select do not have scores attached to them and do not affect the progression of stages.
Depending on configuration, playbook stages may be manually updated or may automatically update based on stage scoring.
To manually update playbook stages,
-
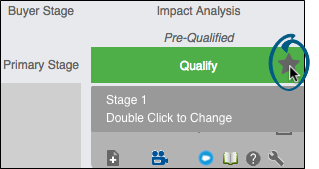
Double click the playbook stage indicator. The "Opportunity Forecast" pop-up displays.
-
Change the stage in the "Opportunity Stage" drop down list. Your field may be named differently depending on configuration.
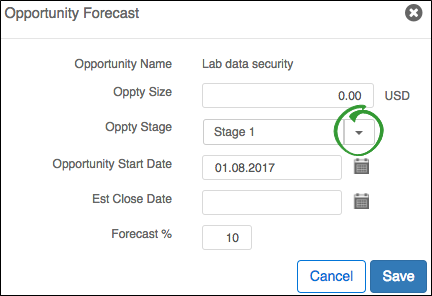

Note: Updating the opportunity stage from the playbook also updates the opportunity stage in the profile and for reporting. -
Click Save. The stage indicator moves to the selected stage.

Milestones put gates in place to assist in completing stages. How milestones are updated depends on configuration by a Revegy administrator.
- Account Playbooks: Milestones may be manually updated or greyed out to indicate that they are not tracked.
- Opportunity Playbooks: Milestones may be manually updated or may automatically update based on stage scoring. Milestones may also be greyed out to indicate that they are not tracked.
- Greyed out milestones display as selected and the top indicator is filled in.
To update a milestone manually, select the milestone checkbox at the bottom of each stage. The milestone indicator at the top of the stage will then fill in automatically.

If attached documents are allowed on an item, then an icon appears in the bottom left corner of the item.
Add documents
-
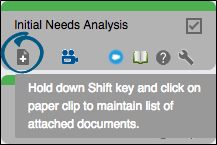
Shift-click the icon in the left corner of the item. The "Attached Documents" pop-up opens.
-
Click New.

-
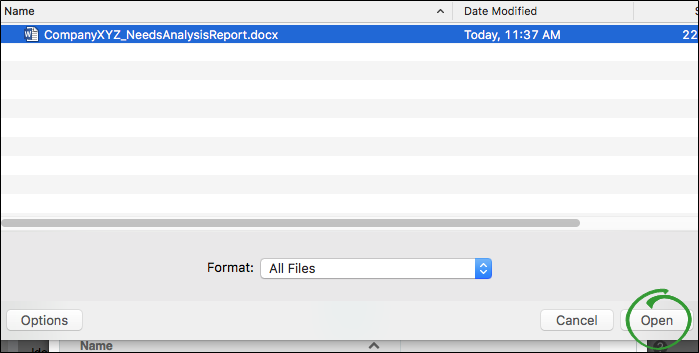
Select the document you want to attach.

Note: Supported file types include: DOC, DOCX, PPT, PPTX, XLS, XLSX, and PDF. You may also upload JPG, GIF, and PNG files. -
Click Open. The access control prompt opens.
-
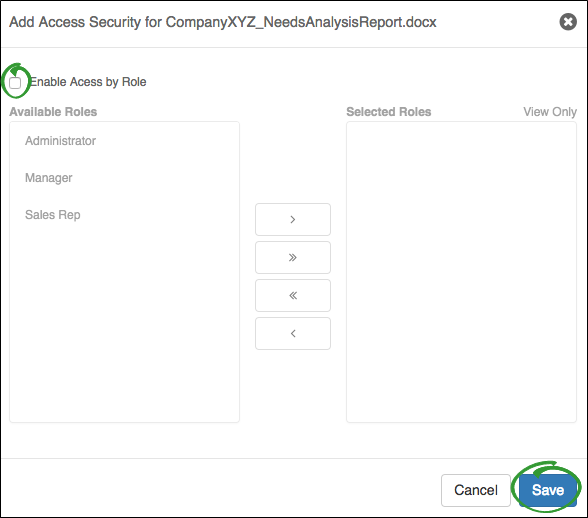
Click Yes if the document requires access control, or No if it does not. If you click "Yes," then the "Add Access Security" pop-up opens.

- Select "Enable Access by Role," then use the arrows in between the "Available Roles" and "Selected Roles" tables to move roles between the two. Select the "View Only" option for a role to grant read-only access.
-
Click Save.
|
|
Note: Documents uploaded to playbook items are also added to the "Documents" section of the currently viewed record. |
Open documents
Click the icon in the bottom left corner of the item to open the attached documents.
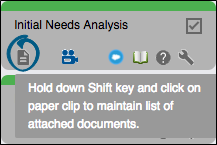
If only one document is attached, it automatically downloads to the destination you have selected your internet downloads to be stored.
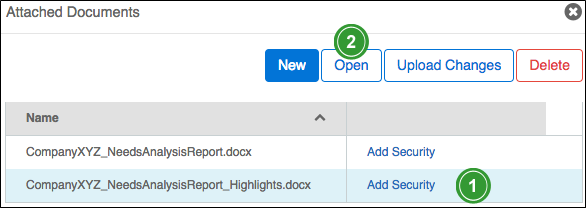
If multiple documents are attached, the "Attached Documents" pop-up opens.
- Highlight the document you want to open.
- Click Open.
Update documents
-
Shift+click the icon in the bottom left corner of the item to open the attached documents.

- Highlight the document you want to update.
-
Click Upload Changes.
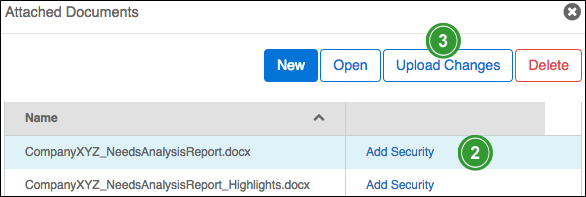
- Select a document with the same name as the highlighted document.
-
Click Open. The new document replaces the existing document.

Delete documents
|
|
Note: Once a document is deleted from an item, it is permanently deleted. |
-
Shift+click the icon in the bottom left corner of the item to open the attached documents.

- Highlight the document you want to delete.
- Click Delete.
- Click Yes to confirm the deletion.
Supported file types include:
- DOC
- DOCX
- PPT
- PPTX
- XLS
- XLSX
- JPG
- GIF
- PNG
Playbook items may have icons that link to specific Revegy tools or to outside resources. Revegy tools may include maps, specific plan objects, whole plans, or call plans. Other resources may include links to help guides, templates, presentations, or websites.
-
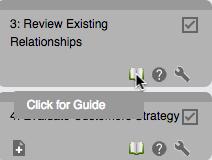
Hover over the icons on playbook items to display the title of the resource or the Revegy tool (always the last icon).
-
If "Select Tool" displays while hovering over the last icon, then multiple Revegy tools are attached to the playbook item.
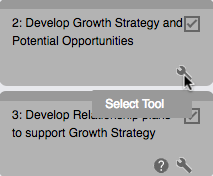
-
Click the icons to open the resources and tools. If multiple tools are attached to the last icon, then a table opens for you to choose which tool to open.
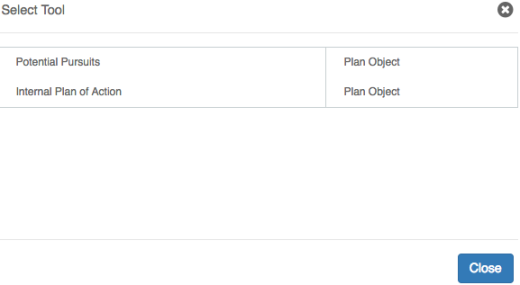
-
A Revegy tool may be edited directly from the playbook.
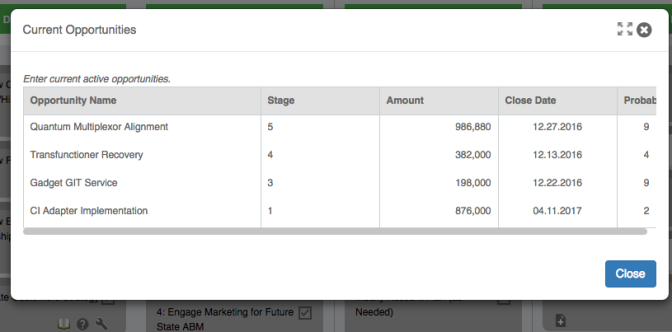
Split Screen view is available for use with playbooks and their attached tools. In order to use Split Screen, it must first be activated from the Revegy Admin Module [System Preferences].
With Split Screen active, you can view and edit playbooks and their associated tools at the same time. To use this feature, first select a map with tools attached.
Then click on the wrench icon (![]() ) to select a tool. The tool will automatically be displayed on the right-hand side of the screen. Now you can proceed to make changes
as you would normally. The screen that is currently active for editing will be highlighted in blue.
) to select a tool. The tool will automatically be displayed on the right-hand side of the screen. Now you can proceed to make changes
as you would normally. The screen that is currently active for editing will be highlighted in blue.
For example, in the screenshot below, the right side is currently active.
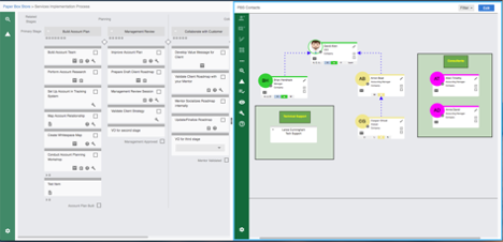
To exit Split Screen mode, drag the split bar to the far right to close out the right-hand side information or to the far left to close out the left-hand side information. The split bar is the middle bar separating the two views, identifiable by three vertical dots.
Playbooks are printed to PDF. The PDF opens in a new internet browser window/tab so that you may save the PDF wherever you need.
- Click the Export icon (
 ) in the left side menu of an open playbook.
 -
Click Print. The playbook opens as a PDF.

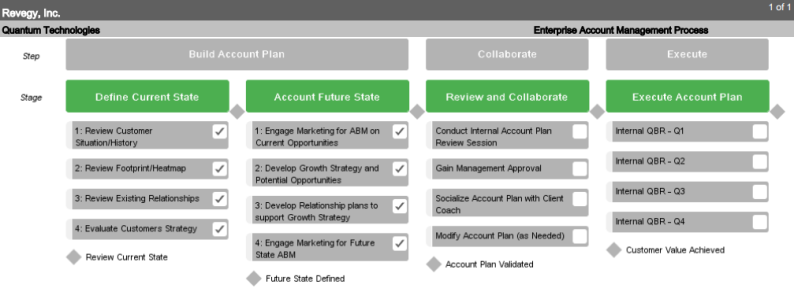
Playbooks are exported as Microsoft PowerPoint presentations. The presentations save and download to the destination you have selected your internet downloads to be stored.
- Click the Export icon (
 ) in the left side menu of an open playbook.
 -
Click Export. The playbook saves and downloads as a PowerPoint presentation.

Playbooks are archived as PDFs and stored in the "Documents" section for the currently viewed record.
Archiving is helpful for taking snapshots of major changes and progress within your accounts and opportunities.
- Click the Actions icon (
 ) in the left side menu of an open playbook.
 -
Click Archive. The playbook saves as a PDF in the "Documents" section for the currently viewed record as "[Playbook Name] [Current Date and Time]."
