Configured Actions
Configured actions plan objects are:
- Custom plan objects that utilize GOSPA. GOSPA is a performance management process for planning implementation processes, and it stands for goals, objectives, strategies, plans, and actions (tasks)
- Useful when you need to schedule tasks associated with specific goals
- Useful when you need a clear visual (in a tree format) on what it takes and what needs to be done to reach a goal
- Able to be integrated with Salesforce.com and Microsoft Dynamics
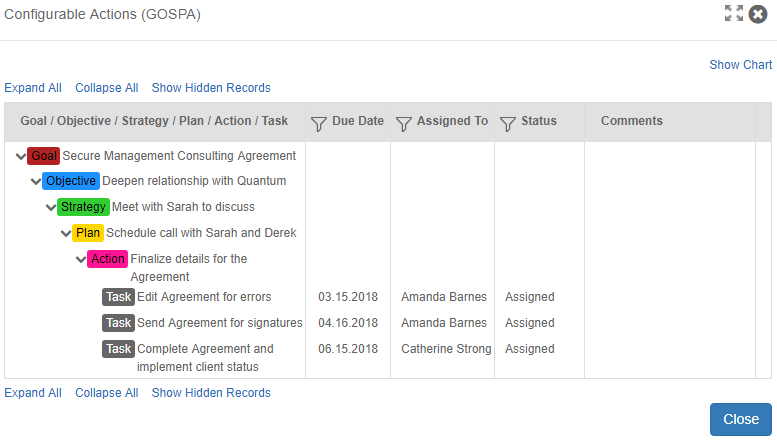
Configured actions plan objects may be viewed and edited from a plan or call plan Table of Contents or from a tab. If enabled, configured actions may also be added to your record overview page as a widget.
From the Table of Contents
-
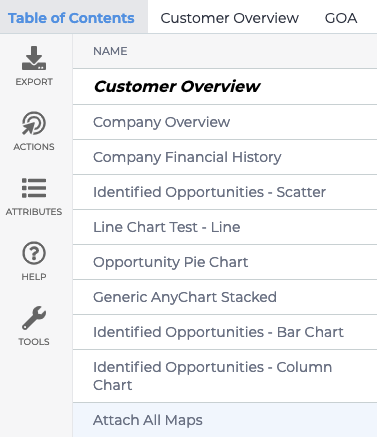
Open a plan or call plan. If enabled, the Table of Contents is opened by default.
-
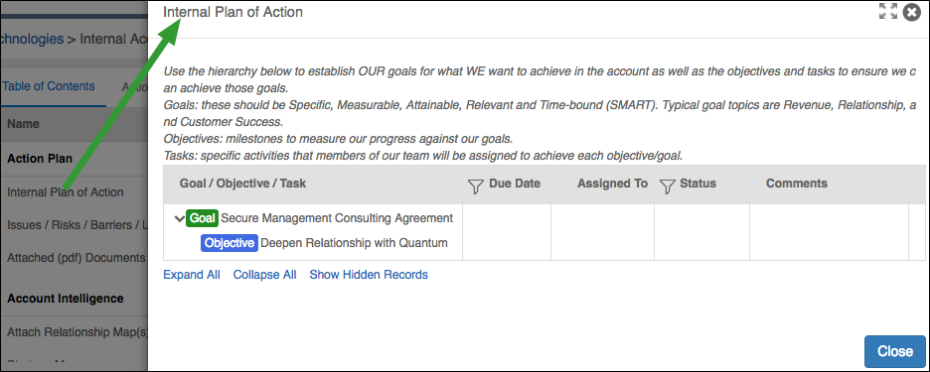
Click the configured actions plan object name to open the plan object.
- (optional) Use the expand (
 ) and collapse (
 ) icons to expand or collapse the plan object for more space.
 -
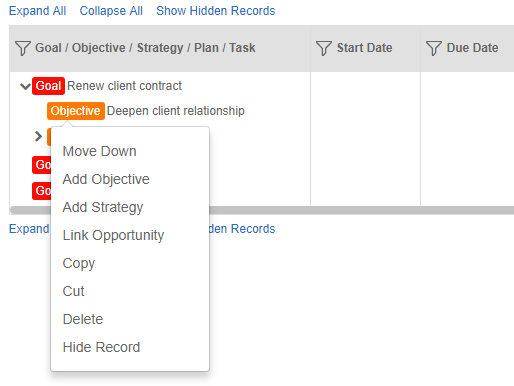
Click within an input field to add information to the plan object. Click a parent level header to add additional levels, tasks, link to an opportunity (if enabled by Admin), or view more options.
-
Save or cancel your changes with one of the following options:
- Click Save to save information without closing the plan object.
- Click Save & Close to save and close the plan object.
- Click Cancel to close the plan object without saving.
From a tab
- Open a plan or call plan.
-
Select the tab the plan object is on, then scroll to find the plan object.

-
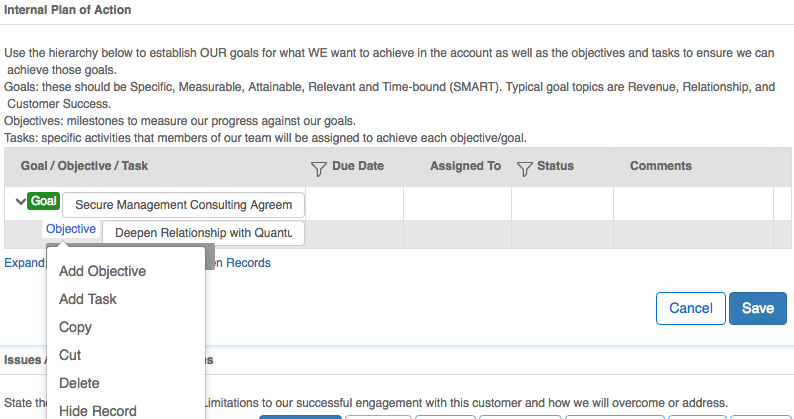
Click within an input field to add information to the plan object. Click a parent level header to add additional levels, tasks, link to an opportunity (if enabled by Admin), or view more options.
-
Save or cancel your changes with one of the following options:
- Click Save to save information and exit edit mode.
- Click Cancel to exit edit mode without saving changes.
From an overview widget
- Open an account, opportunity, partner, or your portfolio/territory overview.
-
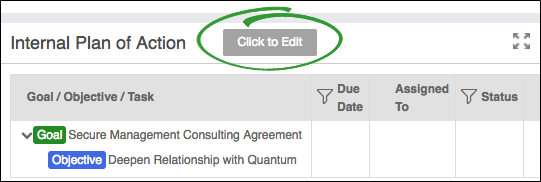
Click the plan object widget to open it.
- (optional) Use the expand (
 ) and collapse (
 ) icons to expand or collapse the plan object for more space.
 -
Click within an input field to add information to the plan object. Click a parent level header to add additional levels, tasks, link to an opportunity (if enabled by Admin), or view more options.

-
Save or cancel your changes with one of the following options:
- Click Save to save information without closing the plan object.
- Click Save & Close to save and close the plan object.
- Click Cancel to close the plan object without saving.
Parent levels are the headers that indicate a particular GOSPA level, such as goals, objectives, strategies, and plans. Parent levels do not include actions (tasks).
These levels may be named differently than "goal," "objective," "strategy," and "plan," and there may be more or less levels per configured actions plan object.
-
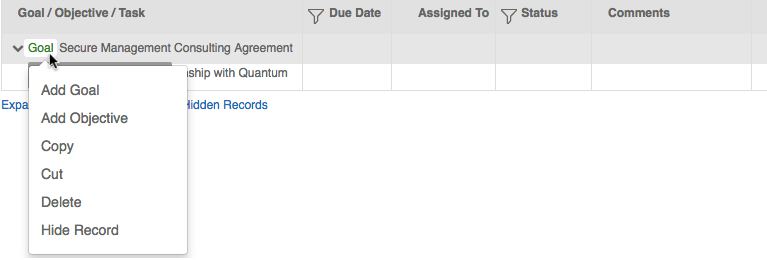
Click a parent level header to open additional options.
-
Click Add [Parent Level].
- This option changes depending on the level header you have selected.
- Only the currently selected level and one nested level below is available.
- You may add as many of the same levels as needed.
-
Enter text for each field. If a drop down list is at the end of the level, then default options are available to select. These options may still be edited once selected.

- Click Save.
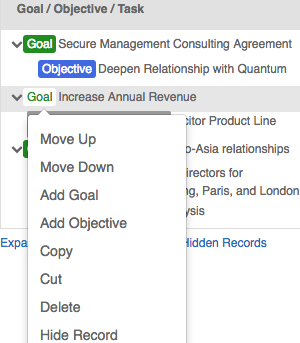
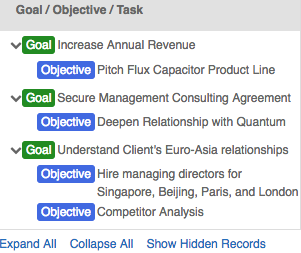
Parent levels may be moved up and down one position at a time. Any nested items move with the parent levels, and nested items may only be moved within their nested section. For example, objectives cannot be moved between different goals but must stay nested under the same goal.
-
Click a parent level header to open additional options.
-
Click Move Up or Move Down.
- Click a parent level header to open additional options.
-
Click Copy or Cut. Cut removes the levels from the plan object, and you must click "Yes" to the prompt to confirm the cut.
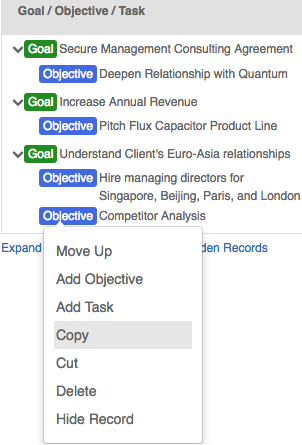
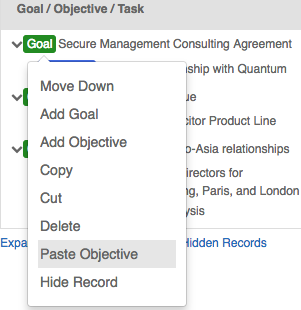
- Click the header of the parent level that the copied/cut level should be added to.
-
Select Paste [Parent Level].
The item is pasted at the bottom of the configured actions tree if it is at the top-most goal level, or it is pasted below the last item of the same level if it is a nested item.
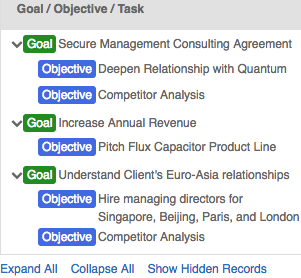
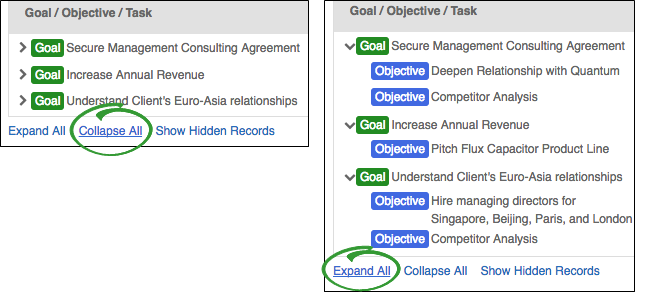
To collapse all levels, click Collapse All. To expand all levels, click Expand All.
Hide levels
You may wish to hide old or completed information without deleting it from your configured actions. Parent levels cannot be hidden if open tasks are attached, and all nested levels are hidden with your selected level.
- Click a parent level header to open additional options.
-
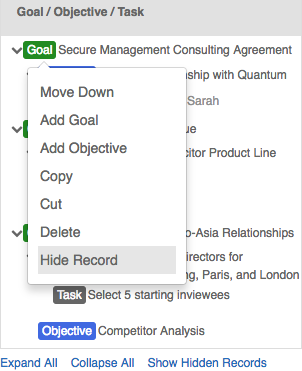
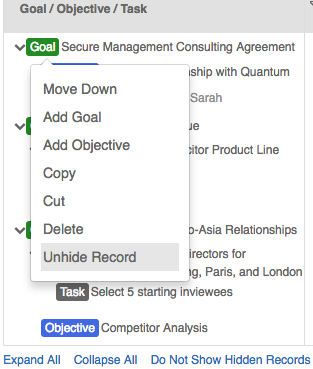
Click Hide Record. The level and nested levels are hidden.
-
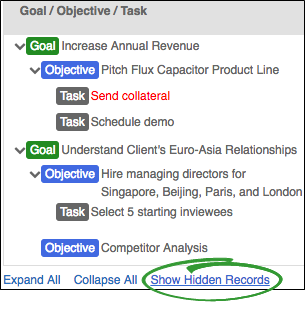
Click Show Hidden Records to display all hidden levels.
-
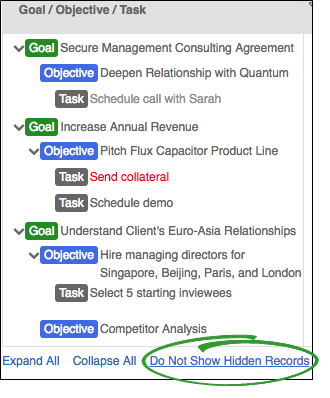
Click Do Not Show Hidden Records to hide all hidden levels.
Unhide levels
-
Click Show Hidden Records to display all hidden levels.

- Click a parent level header to open additional options.
-
Click Unhide Record. The level and nested levels are unhidden.
Link an Opportunity
While editing goals, objectives, and actions (GOA) within a plan, it is possible to link opportunities to the goal as an objective. You can also link an opportunity to the objective as a strategy.
|
|
Note: This feature is only available if it is enabled in the Revegy Admin Module. |
- Select the plan you want to edit that contains GOA configurable actions.
-
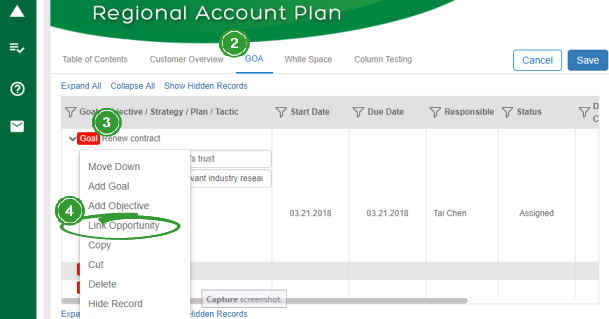
In the example below, click the GOA tab to open it.
-
Click on the Goal, Objective, or Strategy to open a drop-down menu of options.
-
Select Link Opportunity to link an existing opportunity to the configurable action you have chosen.
-
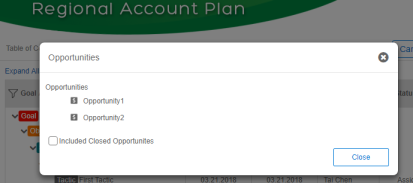
Select one of the available opportunities from the list.
Unlink an opportunity
Note that unlinking an opportunity from a configurable action does not delete the opportunity.
-
Click on the opportunity that you no longer want to be associated with a configurable action.
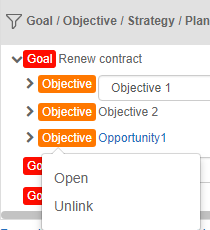
- Select Unlink. The opportunity will no longer be associated with the configurable action.
Tasks display on the record overview page in the "Alerts" section. If configured, you may receive emails when tasks are assigned to you, updated, or past due.
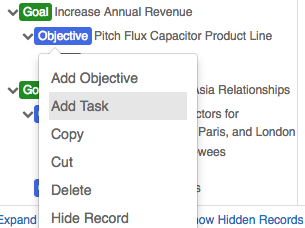
Tasks may only be added to the last parent level available.
- Click a the last available parent level header to open additional options.
-
Click Add Task.
-
Click within an input field (for example, a text box, a date, or a time) to add information to the task.
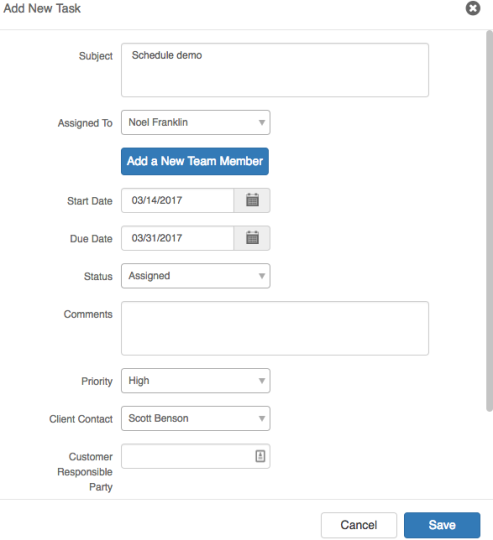
- Click Save.
Edit tasks
Click within an editable field to update task information. To open the "Edit Task" pop-up to access additional fields, double-click the task header.
If enabled, emails may be sent to the person assigned to the task that a change was made.
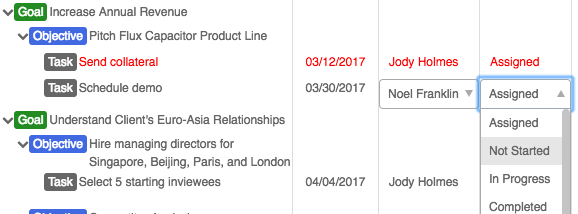
- Overdue Tasks: Display in red
- Completed Tasks: Display in light grey
- Active Tasks: Display in dark grey
Parent levels and tasks are permanently deleted from the plan object.
|
|
Note: All nested levels and tasks are deleted with any parent level you delete. |
- Click a the last available parent level header to open additional options.
-
Click Delete.
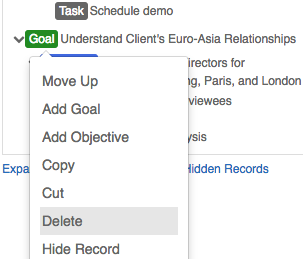
- Click Yes to the prompt to confirm the deletion.
Filtering by Keyword Search
Configurable Actions (GOSPA) and Comments fields
Filtering can be used on any field in configurable actions. When applying a filter, a list of items matching criteria specified by the user will be returned. Filtering for an item shows that item's point of origin (ie. all levels above the search item that have been linked to that item), but it does not show any children of that item.
For example, consider the following setup below. The user has created the following configurable actions: Goal: "Renew contract" with Objective: "Deepen client's trust" under it, with Strategy: "Provide relevant industry research" under it, as well as Objective 2 under the first goal and two different goals. When filtering for the keyword "client," the objective containing "client's" becomes visible, as well as the goal at the level above the searched term. However, the strategy attached below that specific objective, as well as other unrelated GOSPA configurable actions, become hidden.
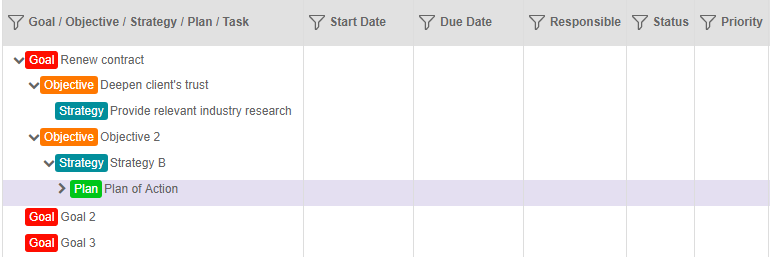

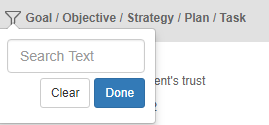
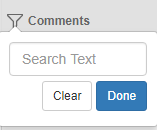
To use filter, click on the funnel icon next to the field name you want to sort by in the configured actions table. Type any keyword to perform a search. This is applicable for the GOSPA (Goal/Objective/Strategy/Plan/Task) field and Comments field.
Filtering by Date
Start Date, Due Date and Date Completed fields
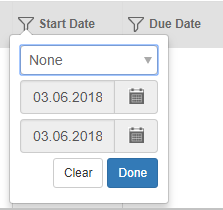
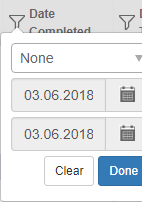
- The filter icon fills in when at least one date is selected.
- Use the drop down list to select to filter by no dates, before a selected date, after a selected date, or between two dates. When filtering by date, the date input by the user is included in the search results.
- Click the "Clear" button to reset the filter.
- Click the "Done" button to apply the filter.
Filtering by a Fixed Value (Name, Status, Priority level)
Responsible and Client Contact field


- For the Responsible field, only team members who have a task assigned display in the list.
- For Client Contact, a list of names associated with the account will be displayed in the list.
- The filter icon fills in when at least one name is selected.
- Click the "Clear" button to reset the filter.
- Click the "Done" button to apply the filter.
Status and Priority fields
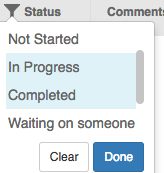
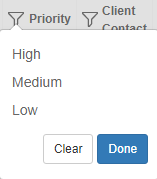
- The filter icon fills in when at least one option (ie. state of progress or priority level) is selected.
- Click the "Clear" button to reset the filter.
- Click the "Done" button to apply the filter.
GOA is a Configurable Actions custom plan object that utilizes GOSPA.

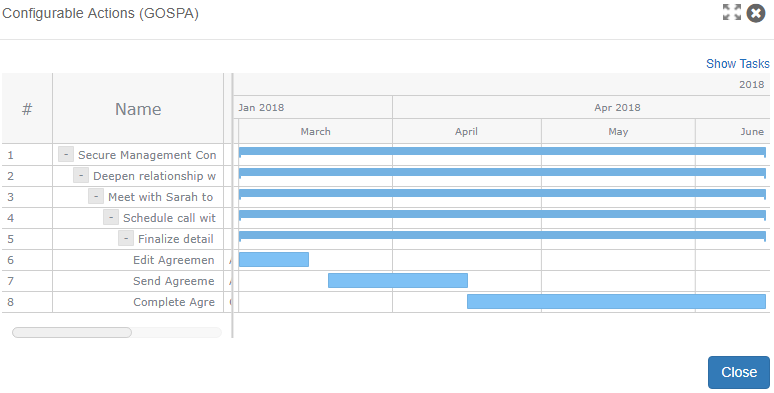
GOA and Task List Charts have been added as new chart options within Revegy. For example, if the Configurable Actions object is configured in a Gantt view scheduled timeline, it will be represented as in the example below. Tasks can be assigned to specific users, while the progress bars indicate the timeline percentage of each Goal, Objective, and Task.
(if enabled) Click Show Chart to display the Gantt view chart. Click Show Tasks to display the table view and edit the data.
Additional resources and help links may be attached to a plan object. These resources provide you with supplementary information and tools, for example, a video, a template, or a quick reference guide.
-
Hover over each icon in the top right corner of the plan object to view details.

- Click an icon to open the resource. The display behavior of a website or a document is determined by your browser settings. For example, a website may open in a new browser tab or window.
If you are viewing a plan object from a tab, then the help links are all under one icon in a drop down list. Click each drop down item to access the additional content.
Revegy offers the ability to integrate tasks with Salesforce.com (SFDC) and Microsoft Dynamics.
Configured actions plan objects can be integrated to push tasks from Revegy to your CRM, but only one configured actions configuration can be integrated to receive tasks from your CRM.
Add tasks
- New tasks:
- Are only pushed to your CRM from Revegy if a plan object is integrated, unless it is the selected plan object configured to send and receive tasks.
- Are pushed to Revegy from your CRM each time the account/opportunity is opened.
- Created in Revegy are added to the "Activities" section of your CRM account/opportunity record.
- For the selected plan object that sends and receives:
New tasks created in your CRM are added to the "'Orphaned' Task List" section in the configured actions plan object. To assign an orphaned task, select the task, then select the lowest parent level available from the top section. Once both the task and parent level are selected, click "Associate Task."
If a CRM user who does not have team member access in Revegy is assigned to a task in the CRM, then the "Assigned To" field is blank in Revegy.
- If a CRM contact who is not a contact in Revegy is assigned as a "client contact" for a task in the CRM, then the "Client Contact" field is blank in Revegy.
Update and delete tasks
- Updates (including deleting a task) for tasks are pushed to Revegy from the CRM each time the account/opportunity is opened.
- Updates for configured actions plan objects are pushed to the CRM from Revegy after "Save" or "Save & Close" is clicked or if auto save is enabled.
- If a task has a "Y" in the last right column, it is integrated with your CRM.
- Parent levels are not integrated with the CRM.