Contact Maps
See Maps for additional assistance with functionality such as printing, exporting, and archiving, and see Drawing Maps for additional assistance in using functionality in the map view such as drawing lines and shapes.
Contact Maps:
- Provide greater understanding and visibility into the true status of relationships with key account/opportunity contacts
- May utilize an auto-layout feature in which contacts are automatically placed on the map in a managerial hierarchy and lines are automatically drawn between contacts
- Are commonly referred to as "relationship maps" or "influence maps"
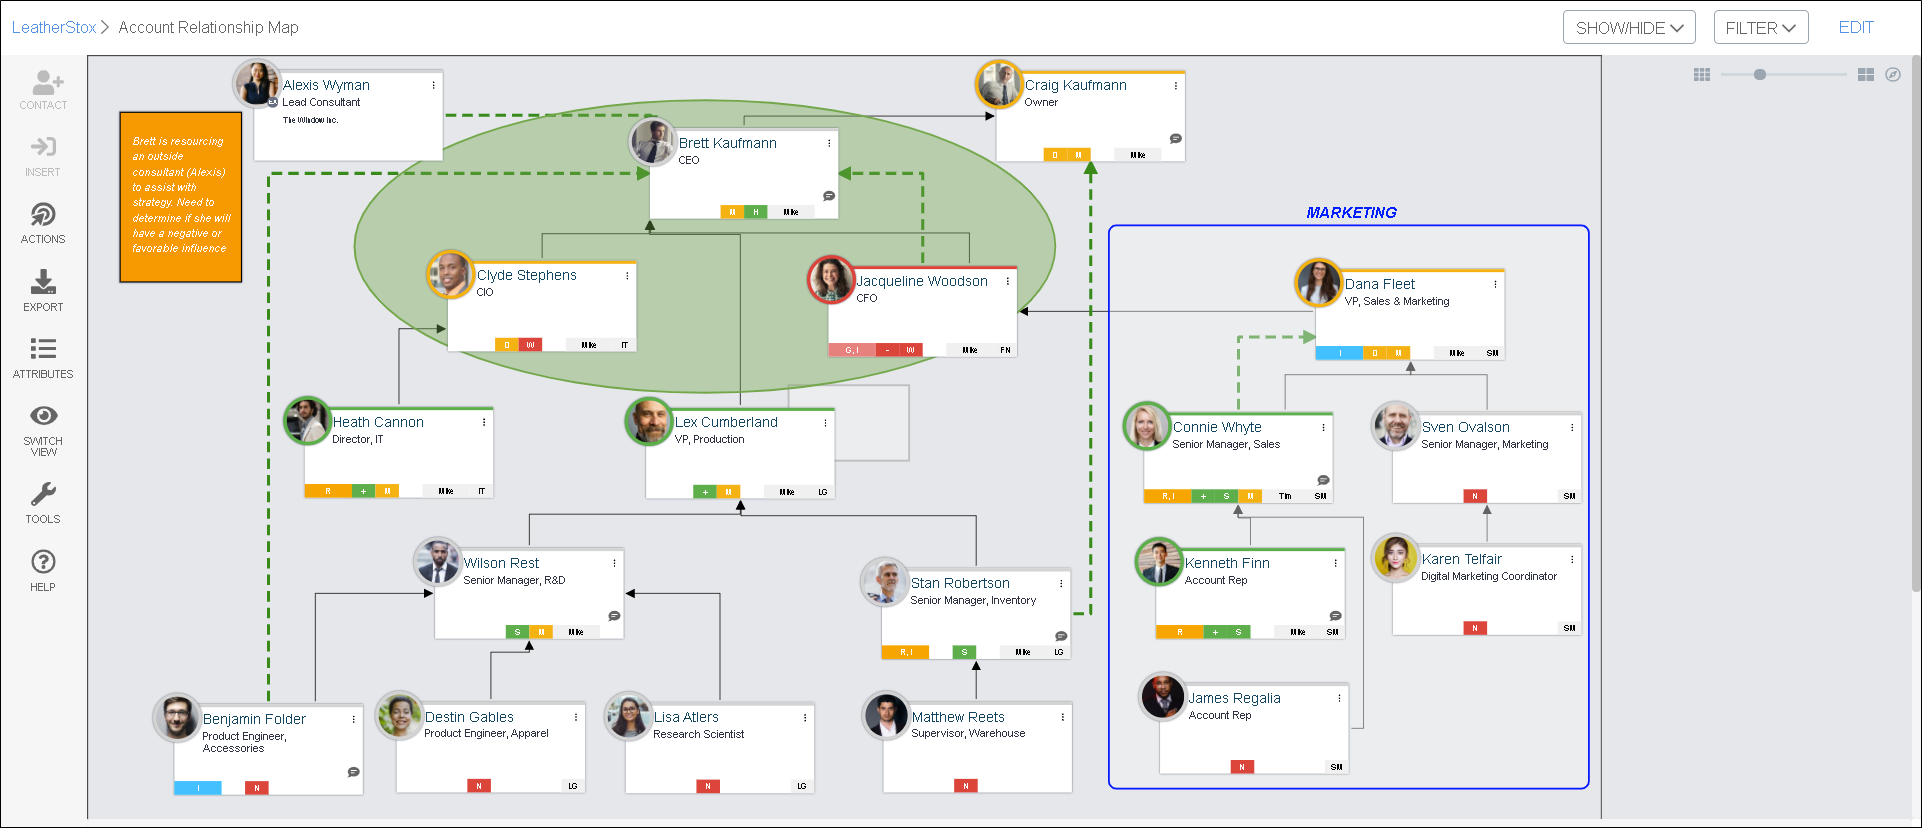
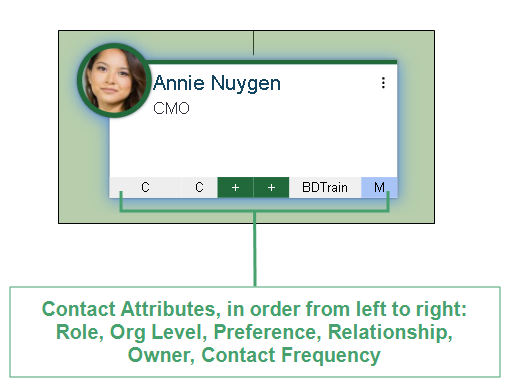
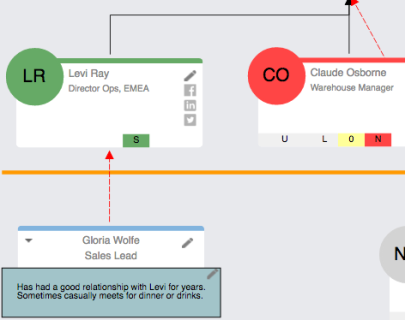
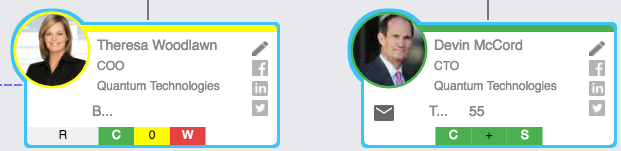
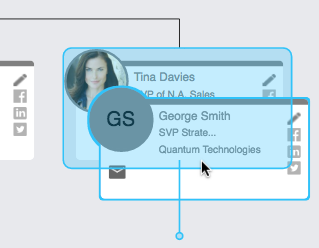
Contact cards are designed to show you a quick glance of important information that helps you determine the status and health of an account or opportunity. You can also quickly access email and social networking profiles.
-
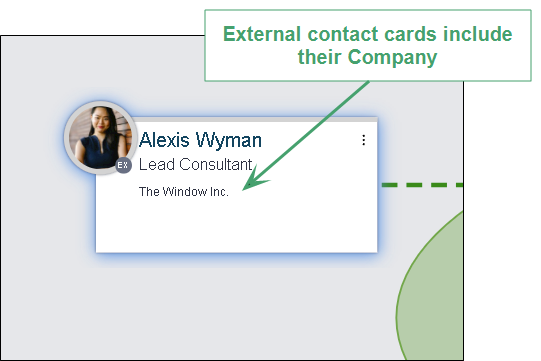
Note: For more information on External Contacts, please review the helpful information found here
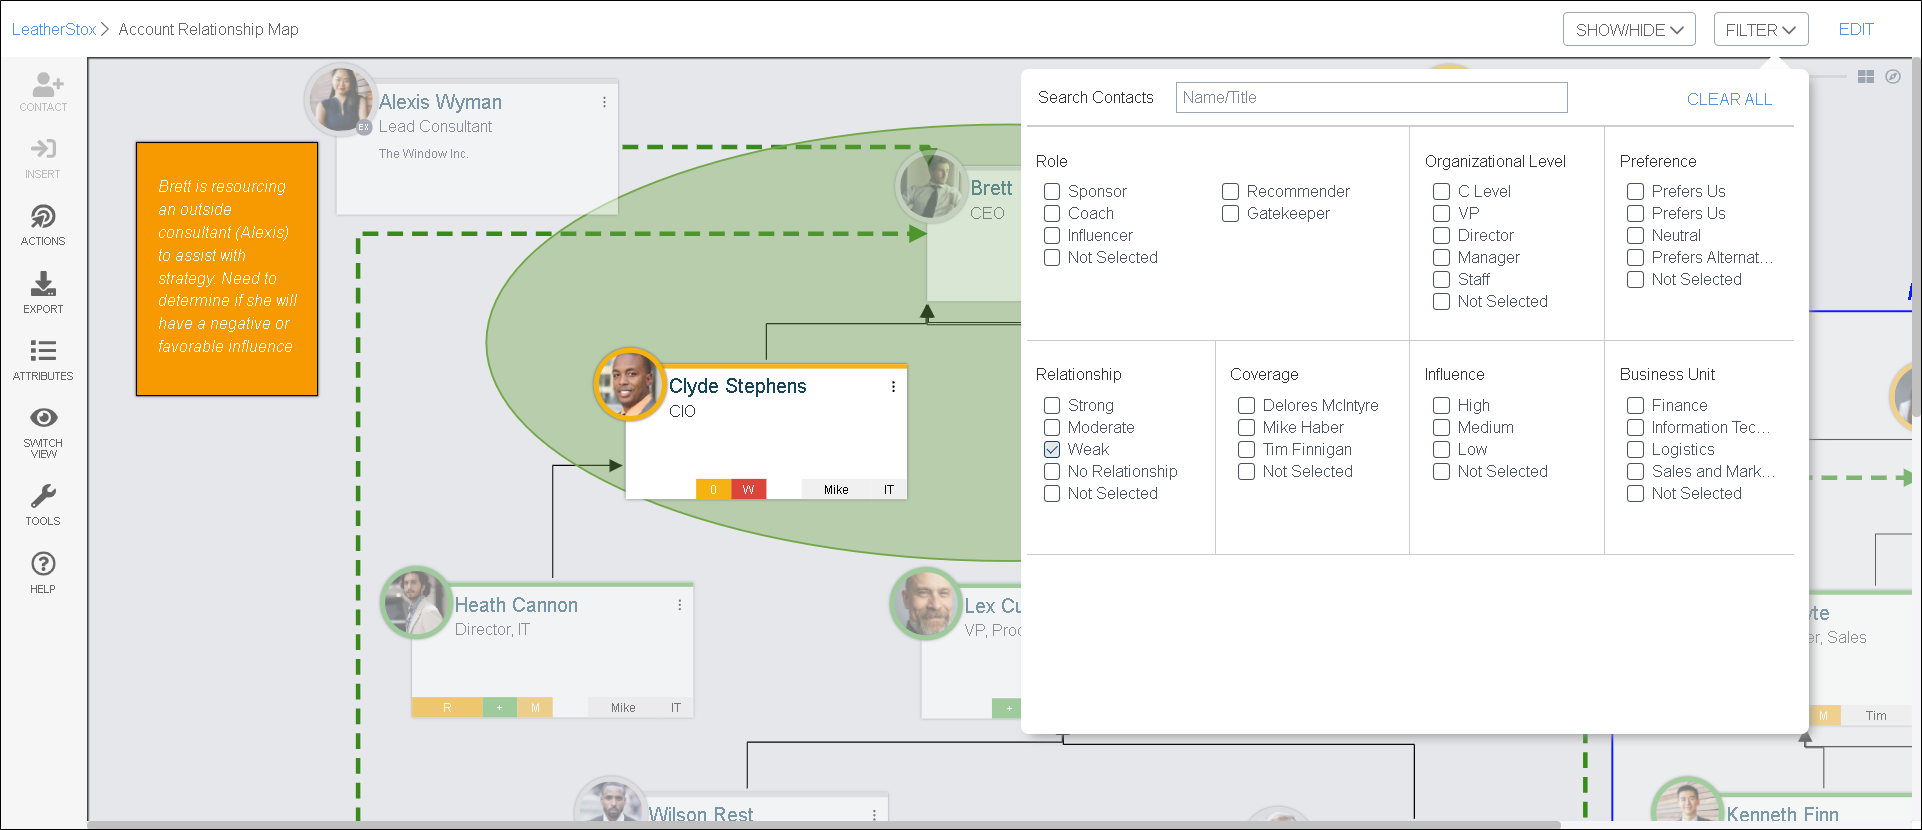
The filter option assists you in quickly pinpointing specific contacts either by name or by attributes.
- Cards that do not match your criteria fade out so that the cards that do match are easy to find.
- Use the "Clear All" button to refresh the filter.
- Click the "Filter" button to collapse the filter while you evaluate the map with your search criteria.
- You can filter the map in view or edit mode.
Adding Contact Cards
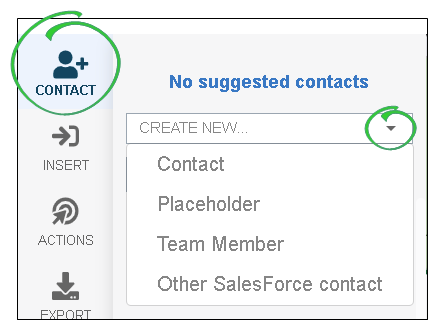
- Click the New Contact icon (
 ) in the left side menu.
 -
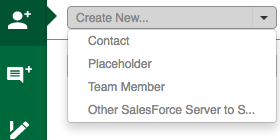
Click the Create New... dropdown arrow.
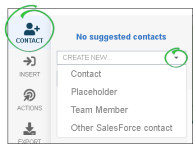
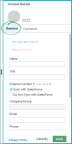
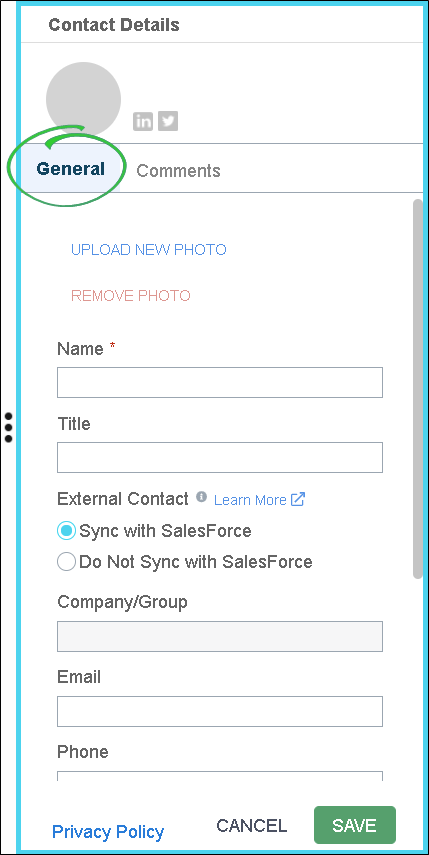
- Select "Contact" from the drop down list. The "Contact Details" window will open in split-screen view, defaulting to the "General" tab.
-
Enter new contact information into the "General" tab.
-
Note: For more information on External Contacts, please review the helpful information found here
-
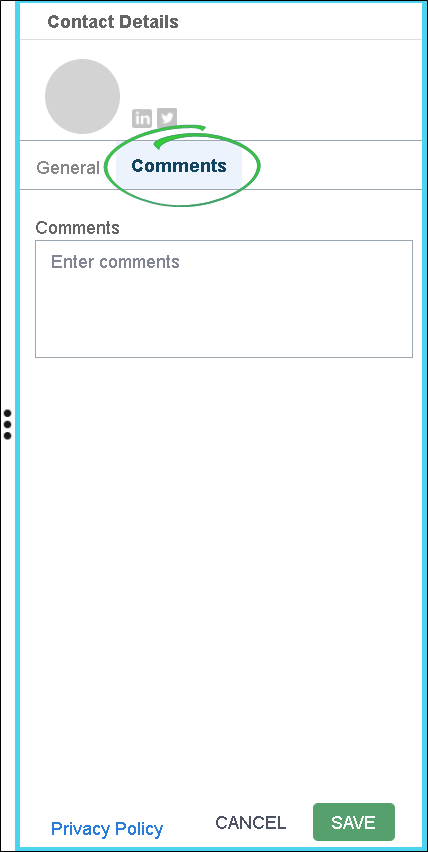
- Click the Comments tab.
-
Enter any helpful comments for the new contact.
-
Click Save.
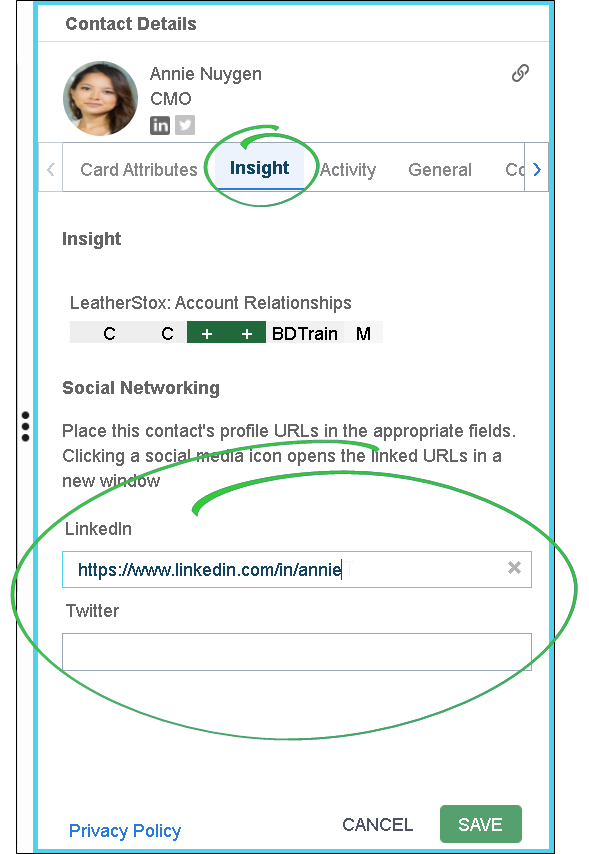
Adding Social Media Profiles
- Double-click on the contact card to open the Contact Details window.
- Click Edit (lower right corner).
- Open the Insight tab and manually enter the social media links.
Note: For an explanation of the information displayed in the Insight tab, please review the helpful information found here.
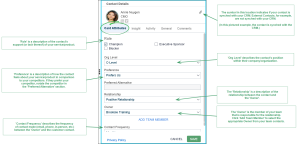
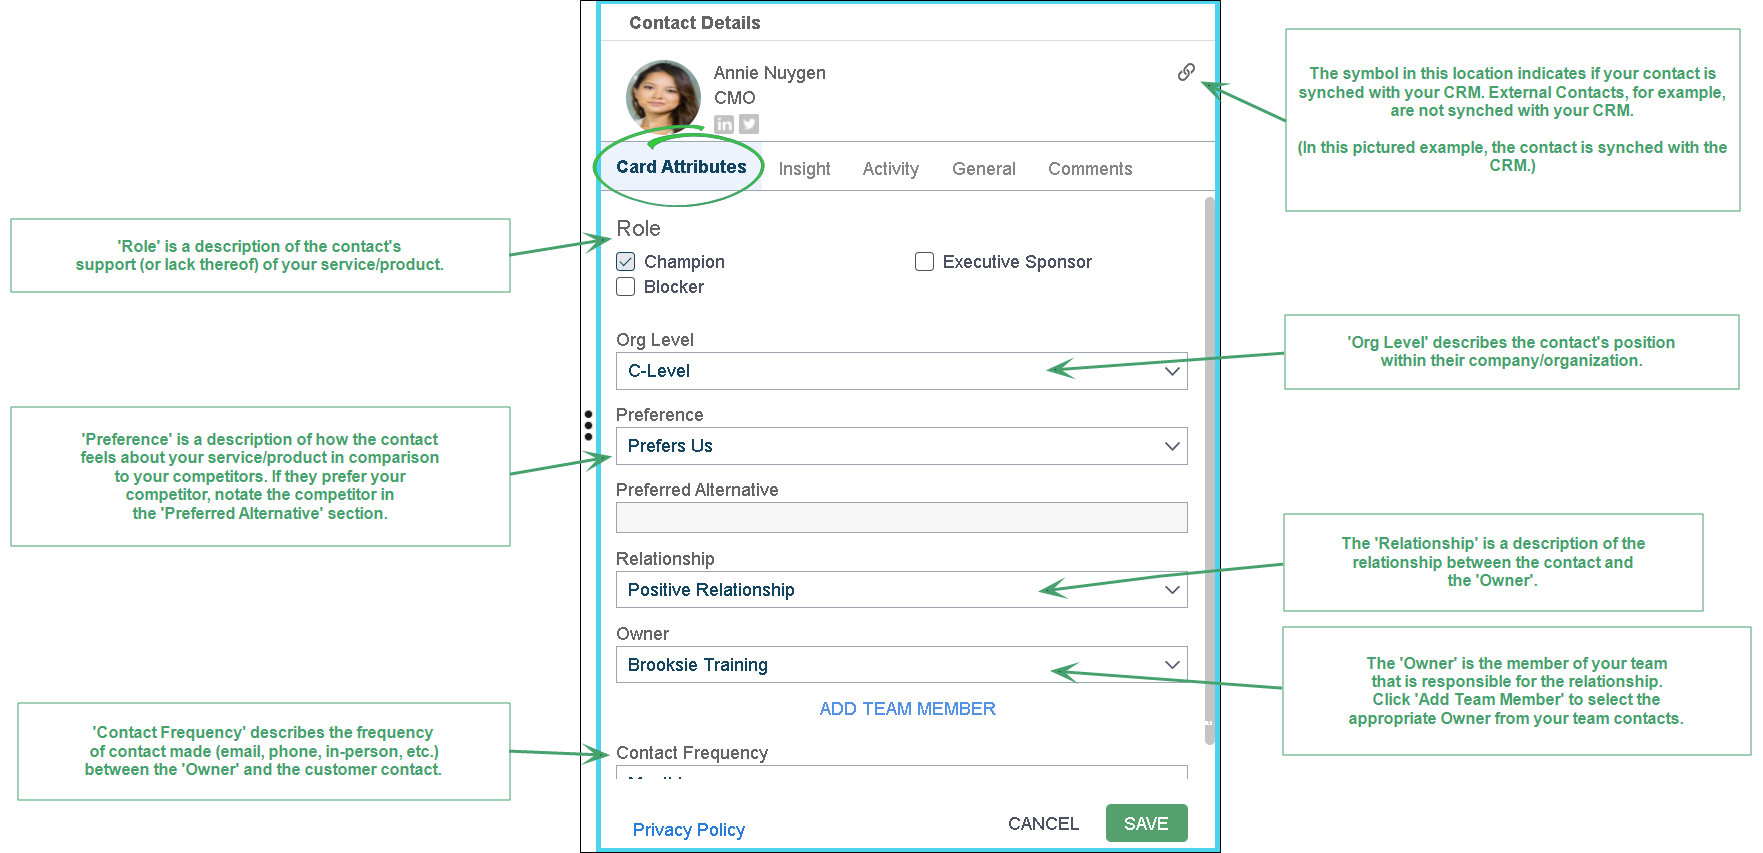
Adding Attributes
- Double-click on the contact card to open the Contact Details window.
- Click Edit (lower right corner).
- Fill out any known attributes for the contact.
- Note: The attributes are based on your (or your team's) relationship with the contact.
- Best Practice: Only provide details that have been confirmed. If a detail has not been confirmed, leave it blank. Avoid guessing.
Note: If the desired Team Member is not listed, the steps for adding a Team Member are located How to add team members
Note: For more information on External Contacts, please review the helpful information found here
-
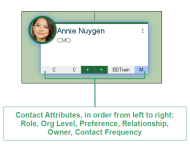
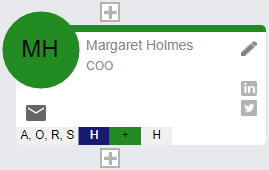
Click Save (lower right corner). The contact's attributes are now visible on their card.
Adding Team Member Cards
Team member cards are useful when you need to visually indicate which of your team members are covering a contact or a group of contacts. It is also helpful to indicate any relationships team members may have with contacts by drawing lines between the cards.
- Click the New Contact icon () in the left side menu.
-
Click the Create New... dropdown arrow.
-
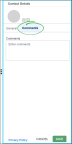
Select Team Member from the dropdown list. The Add Team Member Card pop-up window opens.

- Search for the desired team member in the dropdown list.
- After locating the desired team member, select Add Existing Team Member To Map and proceed to the next step.
- If the desired team member is not in the dropdown list, select Add a New Team Member. Proceed to the For additional assistance adding new team members, please see the "How to add team members" section in the Team Members topic.

-
Edit the team member as needed in the "Team Member Attributes," "Team Security Profile," and "Team Member Details" tabs. The information here reflects the team member profile on the main team member list.

- Click Save. The team member card is added to the map.
-
Drag the card to the place on the map that makes the most sense and draw lines to establish important relationships.
Add CRM contacts
When Revegy is embedded in Salesforce.com or Microsoft Dynamics, another option for contact maps is available in the New Contact menu labeled "Other [CRM] contact." This option allows you to quickly pull in CRM contacts from other CRM accounts that are important to the account or opportunity you are currently working on.
If this option is unavailable, please contact your Revegy administrator.
- Click the New Contact icon (
 ) in the left side menu.
 -
Click the Create New... drop down.
-
Select "Other [CRM] contact." The "Import contact from [CRM]" pop-up opens.
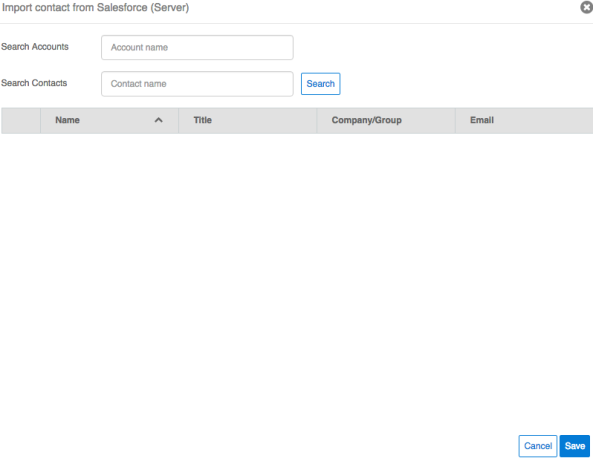
- Enter a specific account in the "Search Accounts" field, or search for a specific contact in the "Search Contacts" field. You may search "%%" to return all possible search results, but please note that the list may be slow to load.
- Click Search.
-
Select the checkboxes for the contacts you wish to add to your map.
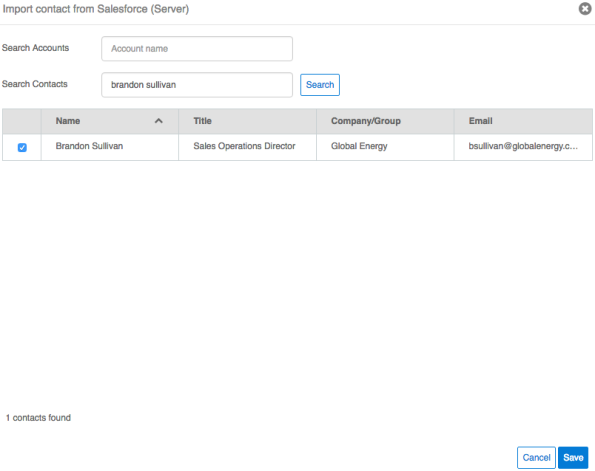
- Click Save.
- Edit any contact attributes for the selected contacts in the "Edit Multiple Contacts" pop-up.
-
Click Save. The contact(s) are added to the map.
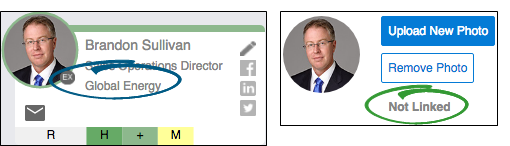
- Contacts are marked as "External."
- Contacts display as "Not Linked" to the CRM on the "General" tab of the "Contact Details" pop-up.
- Drag the card to the place on the map that makes the most sense and draw lines to establish important relationships.
You may create a contact card from a Microsoft Outlook contact. The file type must be a VCF (virtual contact file) file type. There are two method you may choose from to create a new contact card.
Directly from Microsoft Outlook
- Open a contact map in edit mode.
-
Open your contact list in Microsoft Outlook.
- Microsoft Windows: You may use the "Business Card" or "Card" view, but it is recommended to use the "Card" view.
- Mac OS X: Use the "Details" or "List" view.
- Select one contact.
-
Drag and drop the contact from Microsoft Outlook to:
- Microsoft Windows: Your desktop, then to the Revegy map canvas. A new contact card is created, and the "Contact Details" pop-up opens.
- Mac OS X: The Revegy map canvas. A new contact card is created, and the "Contact Details" pop-up opens.
- Edit contact information in the "Contact Details" pop-up. Please see the "How to add and remove a contact photo" section for adding a contact photo.
- Click Save to save and close.
From a VCF (vCard)
- Open your contact list in Microsoft Outlook.
- Right-click a contact, then click Forward Contact > As a Business Card (for Microsoft Windows) or Forward as vCard (for Mac OS X). A new email message opens with the contact card attached as a VCF.
- Drag and drop the attachment from the blank email to your computer desktop. The VCF should copy to your desktop.
- Open a contact map in edit mode.
-
Drag and drop the VCF from your computer desktop to the Revegy map canvas. A new contact card is created, and the "Contact Details" pop-up opens.

- Edit contact information in the "Contact Details" pop-up. Please see the "How to add and remove a contact photo" section for adding a contact photo.
- Click Save to save and close.
Existing contacts are pulled from the Contacts section of your account or opportunity.
- Click the New Contact icon () in the left side menu.
-
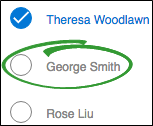
Enter the name or title of a contact, or scroll through the contact list.
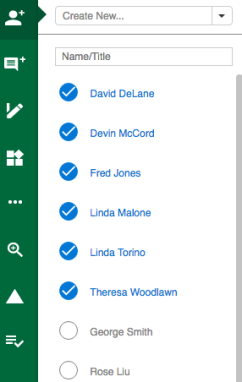
-
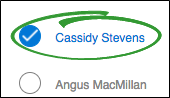
Click the empty circle next to a contact to add the contact to the map.
Contact photos may be added when creating new contacts or after a contact is saved to the contact map.
Add by browsing directories and folders
- Create a new or open an existing contact.
-
Click "General" to open the "General" tab.
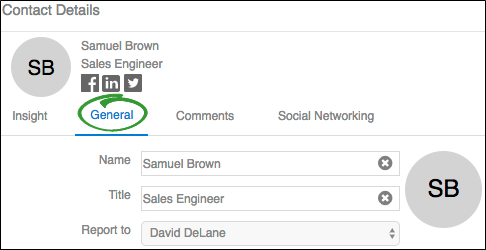
-
Click Upload New Photo.
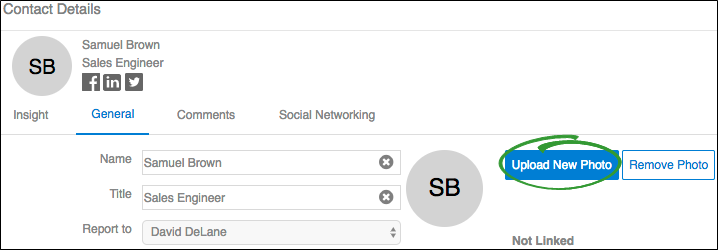
-
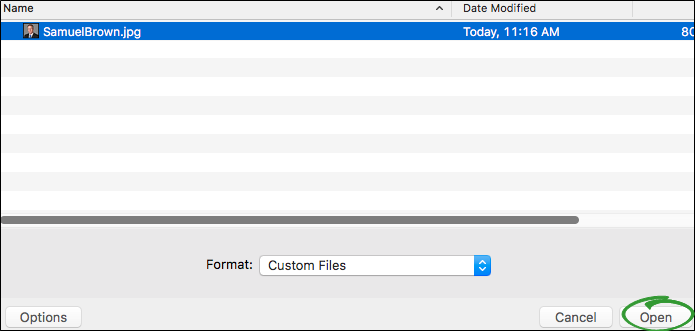
Select the photo you want to upload.

Note: Supported file types include: JPG, PNG, and GIF. There is no size limit. -
Click Open. The contact photo is added to the contact details.
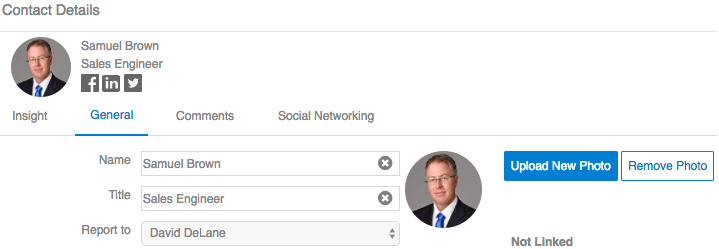
- Click Save on the "Contact Details" pop-up.
Add by dragging and dropping from your desktop
- Add the contact's photo directly to your desktop.
- Create a new or open an existing contact.
- Click "General" to open the "General" tab.
-
Click, drag, and drop the photo from your desktop to the "Contact Details" pop-up or directly to the contact map card. The contact photo is added to the contact details.
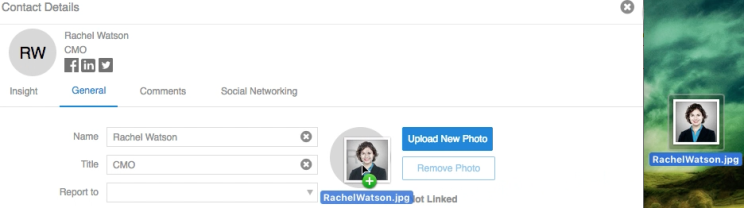
- Click Save on the "Contact Details" pop-up or on the contact map to save your changes.
Remove a contact photo
- Open an existing contact.
-
Click "General" to open the "General" tab.
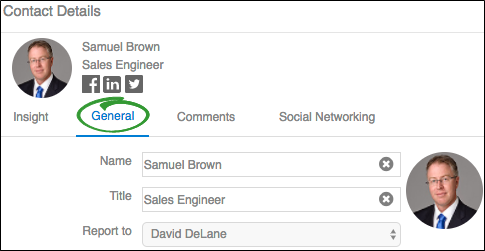
-
Click Remove Photo.
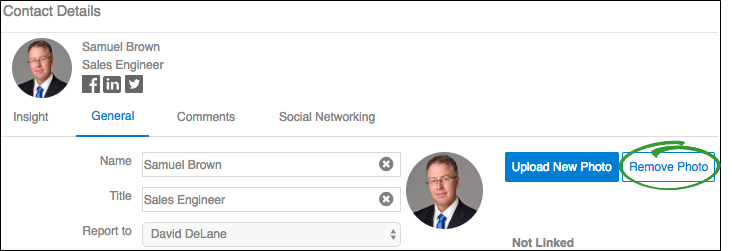
- Click Save.
-
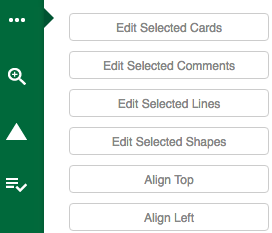
Select multiple contact cards.
- Click the Tools icon (
 ) in the left side menu.
 -
Click Edit Selected Cards. The "Edit Multiple Contacts" pop-up opens.
-
Select and edit attributes for the contacts in the list.

- Click Save. The contacts on the map are updated.
Edit contact cards
- On the map while in edit mode, click the pencil button (
 ) on the Contact card to edit.
 -
Click through the different tabs at the top of the "Contact Details" pop-up, making any necessary changes.
Note: The attributes can be a map or contact level attribute (as before it could only be a map level attribute). 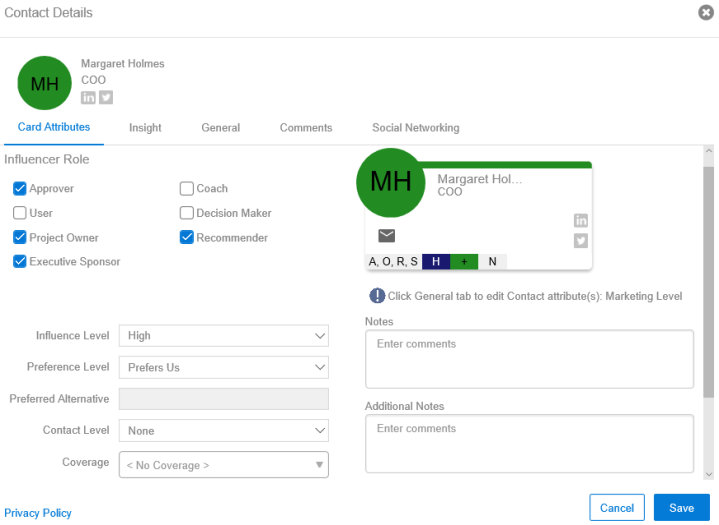
- If there are additional contact attributes to include in the contact card, "Click General tab to edit Contact attribute(s): (i.e. Marketing Level)."
- Click Save.
Edit placeholder cards
Edit title
- On the map while in edit mode, click the pencil button () in the Placeholder card to edit.
-
Update the title.
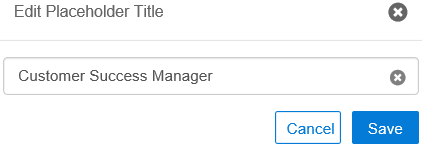
- Click Save.
Add contact
When you learn who is in a role that is indicated by a placeholder card, you should update the placeholder card to reflect the contact.
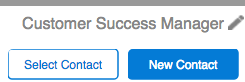
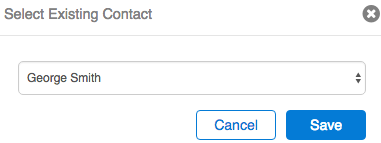
To add an existing contact to the placeholder card, click Select Contact, select an existing contact from the drop down list, then click Save.
To add a new contact to the placeholder card, click New Contact, enter contact details, then click Save.
Edit team member cards
- On the map while in edit mode, click the pencil button () on the Team Member card to edit.
-
Click through the different tabs at the top of the "Edit Team Member" pop-up, making any necessary changes.
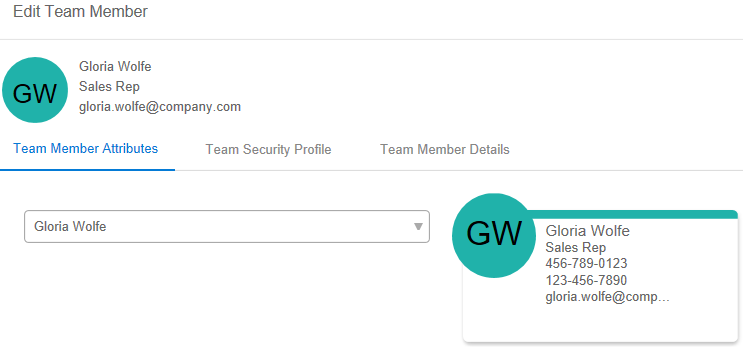
- Click Save.
Contacts and team members cannot be permanently deleted from contact maps. They are only removed from the map.
There are several ways to delete cards.
- Select one or more cards to delete, then click the "Delete" key on your keyboard.
- Select one or more cards to delete, open the Actions menu, then click Delete.
-
Open the New Contact menu, then click the blue checked circle for the contact you wish you to remove. Click Yes to the prompt to confirm the removal.
Users can temporarily change the base highlight of contact cards by attribute: Relationship level, influence level, role, or preference level. Changing the contact card highlight is not permanent. It only lasts during the user's active map session. When the user navigates away from the map and then returns to it later, the highlight is reset to the configuration value set by Admin.
This feature enables users to look at the map from different views while still allowing the company to have a consistent configuration for all users.
In order to use this feature, click on the Attributes icon ( ). Under "Highlight Contact
Card On:" choose the desired attribute from the drop-down menu.
). Under "Highlight Contact
Card On:" choose the desired attribute from the drop-down menu.
The list view displays a list of added contact and placeholder cards with their card details in a table format.
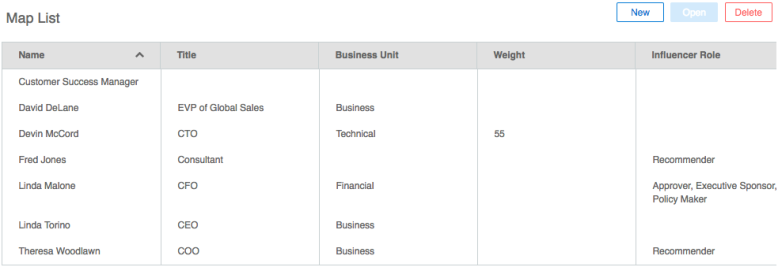
Sort
Click on any column header to sort the list by descending or ascending order.
Filter
Click Filter at the top of the list view to select filter criteria. The contacts that do not match your criteria are hidden in the list.
Add new
-
Click New at the top of the list view while the map is in edit mode. The "New Contact" pop-up opens.

-
Select if you want to add a new or existing contact or a placeholder card.
- Existing Contact: Select a contact from the "Select Contact" drop down list, then click Add Existing Contact to Map.
- New Contact: Click Create a New Contact.
- Placeholder: Enter the title, then click Create Placeholder (Title Only) Card.
- (For new and existing contacts only) Enter known contact details, then click Save.
Open and edit
- Double-click a contact or placeholder card, or highlight a contact or placeholder in the list.
- Click Open at the top of the list view while the map is in edit mode. The "Contact Details" or "Edit Placeholder Title" pop-up opens.
- Click Save after you have finished making changes.
Delete
- Highlight a contact or placeholder in the list.
- Click Delete at the top of the list view while the map is in edit mode.
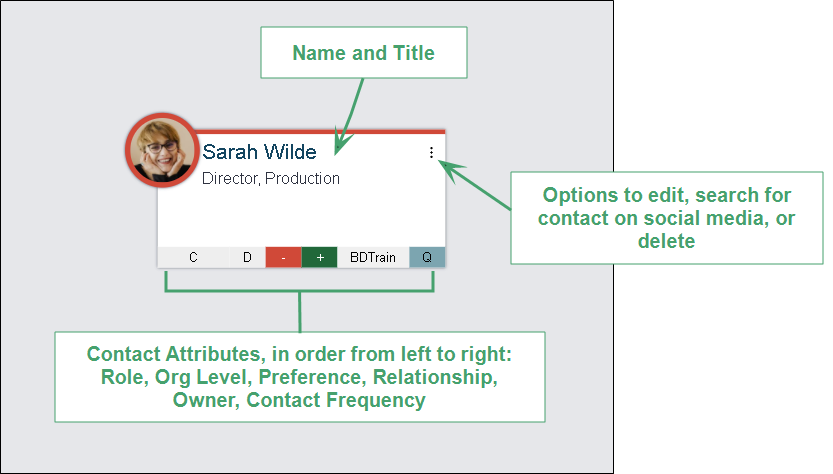
The grid view displays a grid that plots contacts based on attributes. This view helps you better visualize where you stand in terms of health of an account or deal and how much it will take to win a deal based on contact preference, support, and relationship strength.
The grid view must be enabled by a Revegy administrator for each contact map configuration.

Filter
Click Filter at the top of the grid view to select filter criteria. The contacts that do not match your criteria are hidden on the grid.
Edit
Use the "Vertical Label (Y-Axis)," "Horizontal Label (X-Axis)," and "Color Indicator" drop down lists at the top of the grid to change the criteria contacts are plotted on.

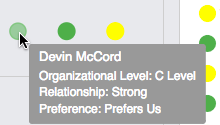
Double-click contact bubbles on the grid to open the "Contact Details" pop-up. Hover over the contact bubbles for a quick view of attributes.
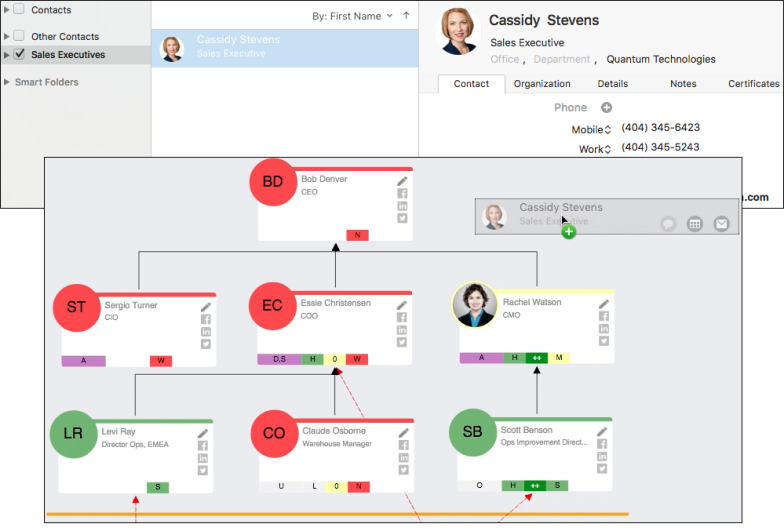
If enabled, auto-layouts function differently than normal contact maps. The placement of contact cards is defined by the "Report To" field in the contact details or the mapped CRM field if Revegy is embedded (for example, the Salesforce.com "Report To" field), and lines are automatically drawn between contacts to visually represent the "Report To" field.
You are also able to define other relationships with different lines, add shapes and comments to further define the nature of relationships, and delete cards and objects as you would in a normal contact map.
If Revegy is embedded in a CRM, then any changes to the auto-layout map automatically saves and updates information in real-time. For example, if a contact is assigned a new "Report To" contact, then this change is immediately reflected in the CRM.
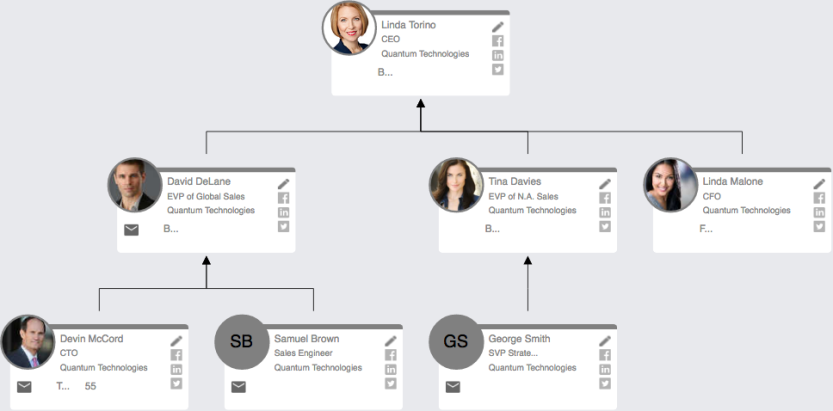
Add contact cards
Contact cards are added to the map in the same way as normal contact maps. If the "Report To" field is populated in the contact details for new or existing contacts, then the card is automatically placed on the map in a managerial hierarchy according to the "Report To" field. Lines are automatically drawn between contact cards.
If a contact is not assigned to another contact in the "Report To" field, it is placed in the middle of the map for you to freely move.
Assign and reassign contacts
You can assign or reassign contacts to other contacts by using the following methods:
-
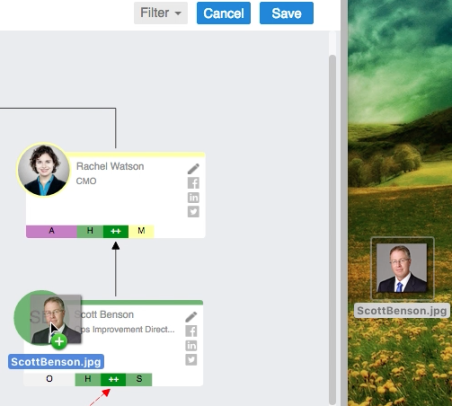
Drag and drop a contact card (assigned or unassigned) onto another contact card. The selected card is automatically assigned to the other contact (the "Report To" field updates) and placed in the managerial hierarchy one level below the contact.
-
Open the "Contact Details," and select the "General" tab. Use the "Report To" drop down list to select the contact that the open contact reports to. Not selecting a contact from the list marks the contact as unassigned.

Unassign contacts
You can unassign contacts from other contacts by using the following methods:
- Dragging and dropping on the map while in edit mode:
- Drag and drop a contact card onto another contact card to unassign it from the current contact and reassign it to the card it was dragged and dropped on.
- Drag a contact card away from the contact it reports to, but not to another contact. When no longer underneath the contact it reports to, release the card and confirm that you wish to unassign the contact. This automatically deletes the line connecting the two contact cards.
- Within the contact card details:
- Open the "Contact Details" for a contact, and select the "General" tab. Clear the "Report To" field by selecting the topmost blank option.
Unconnected contacts
If a contact card on the map has unconnected "Report to" contacts, when edit mode is activated a plus symbol ( ) appears at either the top or bottom of the card. The top plus symbol indicates there is a contact that this person reports to. The bottom plus symbol indicates there are one or more contacts that "Report to" this person.
Hover over the plus symbol to see the "Report to" contact.
- While hovering over the top plus symbol, the following message appears:
- "Click to add [name of contact] to the map or drag onto a different card to change the 'Report to'."
- While hovering over the bottom plus symbol, the following message appears:
- "Click to add 'Report to' contact to the map or drag contacts onto this card to set the 'Report to'."
|
|
Note: The plus symbols only appear when auto-layout is enabled. |
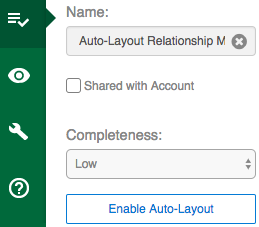
Disable and enable auto-layout
If configured, the auto-layout feature can be disabled or re-enabled.
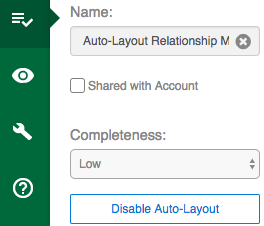
To disable auto-layout, click Attributes icon in the left side menu, then click Disable Auto-Layout. After confirming you want to disable the auto-layout, you are able to move contact cards on the map freely.
To re-enable auto-layout, click Attributes icon in the left side menu, then click Enable Auto-Layout. After confirming you want to enable the auto-layout, the map is redrawn to reflect the "Report To" field.