Drawing Maps
All map types (contact, strategy, issue, generic, and team) share similar functionality when drawing maps in the map view.
You can zoom in and out of a map in view or edit mode.
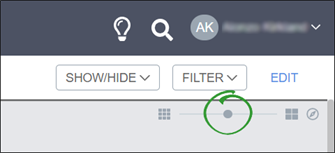
- Locate the Zoom bar in the upper right corner of the screen.
-
Drag the dot along the scale to zoom in and out.
Comments provide additional information to support your findings. Comments may act as helpful hints and tips for your team or as labels to make the map layout more clear.
Add comments
Adding comments is the same for all map types. Comments may only be added while a map is in edit mode.
- Click the New Comment icon (
 ) in the left side menu of an open map.
 -
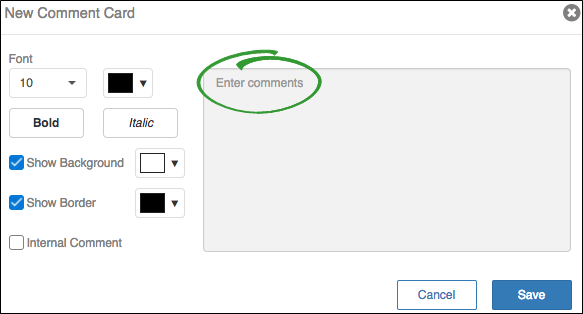
Enter your comment in the text box of the "New Comment Card" pop-up.
-
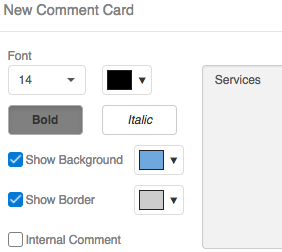
(optional) Change the font size, color, and style, the background color of the comment card, and the border color of the comment card.
-
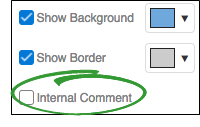
(optional) Select "Internal Comment" if the comment is considered sensitive information and should be hidden with other sensitive items during customer presentations.
- Click Save.
- Drag the comment to the area of the map that makes the most sense.
For generic maps, comments may be used as headers or labels for products.
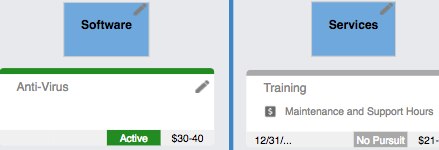
For contact and team maps, comments may be used to provide helpful information about an individual or group.

For strategy and issue maps, comments may be used to provide KPI information.

Edit comments
Map comments are updated by double-clicking on each comment or by clicking the pencil icon in the top right corner of each comment. You may also highlight the comment, then click Actions > Edit from the left side menu.

Map lines define relationships between cards. For example, lines can define who reports to whom or who influences whom. Lines may also draw clear connections between company goals and strategies or issues.
Draw lines
Drawing lines is the same for all map types. Lines may only be drawn while a map is in edit mode.
- Click the New Line icon (
 ) in the left side menu of an open map.
 -
Select a line that best communicates the relationship between cards that you want to establish. The "elbow arrow" and "arrow" options are the only customizable lines and may not be available for you to select depending on the map configuration.

-
Place your cursor over a map card or comment. White dots appear where lines can connect.
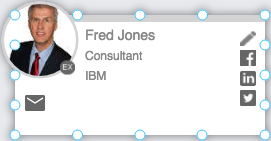
-
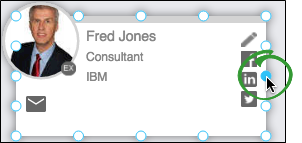
Hover over the dot where the line should begin. The dot turns blue.
-
Click and drag to a dot on another map card, then release your cursor. A line is drawn connecting the two cards using the selected line.

Edit lines
Map lines may only be edited if they are "elbow arrow" or "arrow" types. These options may not be available for you to select if they are not enabled for the map configuration by a Revegy administrator.
Other lines that may not be edited are called predefined lines. These lines create consistency in the map and represent specific relationships, such as "influences" or "reports to."
- Select an "elbow arrow" or "arrow" line.
-
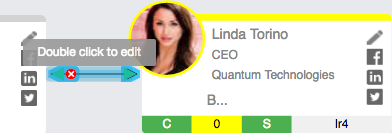
Double-click the line icon on the map, or highlight the line and click Actions > Edit from the left side menu.
-
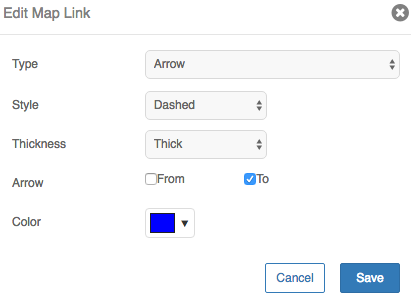
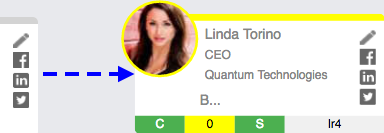
Change the type, style, thickness, arrow direction, and color of the line to best represent the relationship between the cards.
-
Click Save. The line style is updated.
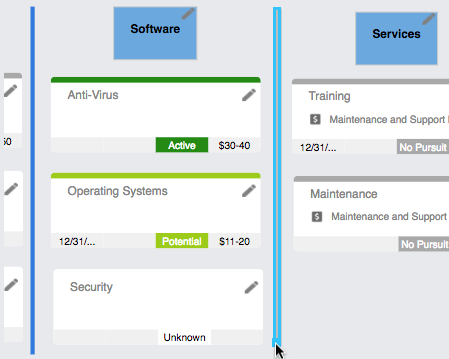
Shapes may be used to highlight areas on a map and group or separate cards, comments, and images.
Add shapes
Drawing shapes is the same for all map types. Shapes may only be drawn while a map is in edit mode.
- Click the New Shape icon (
 ) in the left side menu of an open map.
 -
Select a shape from the menu. The shape is added to the map.

-
Drag the shape to the desired map area.
-
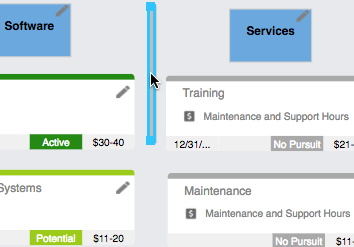
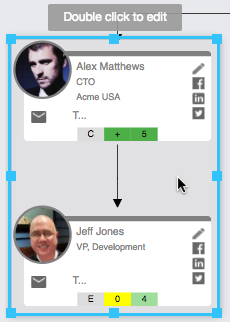
Click and drag the blue points on the highlighted shape to change the length and width.
Edit shapes
-
Double-click the shape on the map, or highlight the shape and click Actions > Edit from the left side menu.
-
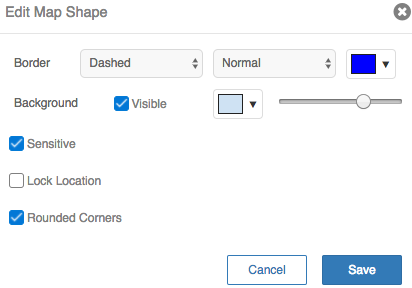
Edit the border and background color, visibility, opacity, sensitivity, and select if the shape is locked in place.
-
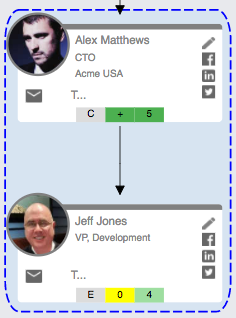
Click Save. The shape style is updated.
Map links create a link, or jump, to any existing map on the same currently viewed record.
This feature is helpful if you have a large map (for example, a contact map) and need to break down the map into smaller sections (for example, split each department into separate contact maps). You can then create a link that automatically jumps to and opens the linked map.
Add map links
Adding map links is the same for all map types. Map links may only be added while a map is in edit mode.
- Click the Tools icon (
 ) in the left side menu of an open map while no map item is selected.
 -
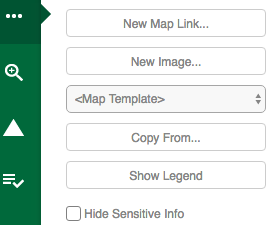
Click New Map Link... from the Tools menu.
-
Select a map to link from the "Select Map" pop-up.
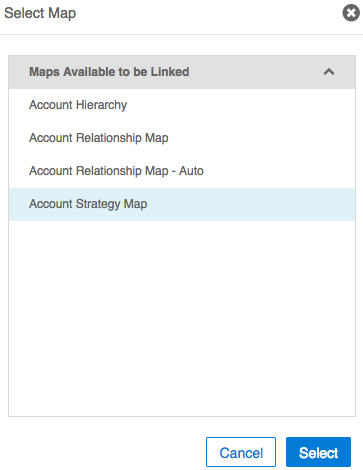
- Click Select.
-
Drag the map link to the area of the map that makes the most sense.
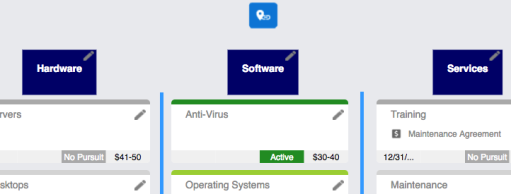
Please note:
- You may create as many links on a map as needed.
- You may add links to any map type (contact, team, strategy, issue, generic).
- The map link icon does not print or export.
Change map links
Changing map links is the same for all map types. Map links may only be changed while a map is in edit mode.
-
Double-click the link icon on the map, or highlight the link and click Actions > Edit from the left side menu.

- Select the new map from the "Select Map" pop-up.
- Click Select. The map link is updated.
Open map links
Opening map links is the same for all map types. Map links may only be opened while a map is in view mode.
To open a map link, click the icon. The linked map opens in view mode.

Images may be used to represent anything you need represented on a map, such as additional shapes or product images. Images allow you to provide further clarity that standard shapes and lines may not be able to provide.
Add images
Adding images is the same for all map types. Images may only be added while a map is in edit mode.
- Click the Tools icon (
 ) in the left side menu of an open map while no map item is selected.
 -
Click New Image....

-
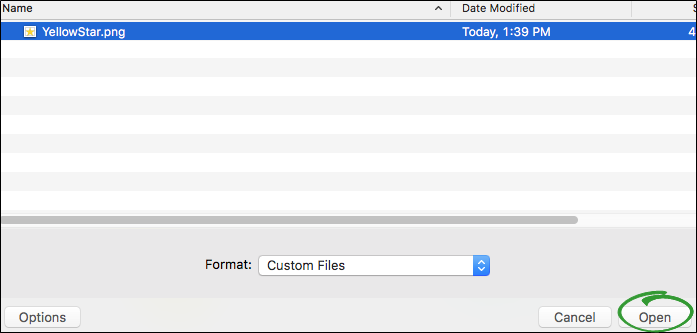
Select the document you want to attach.

Note: Supported file types include: JPEG, PNG, GIF. The file size must be under 100 kb. -
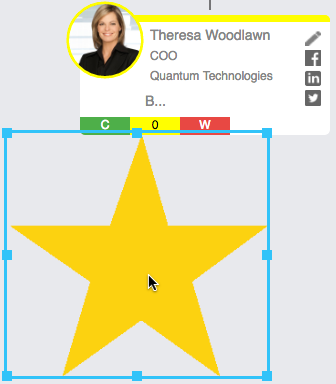
Click Open. The image becomes editable once it is added to the map.
-
Drag the image to the desired map area.
-
Click and drag the blue points on the highlighted image to change the length and width.
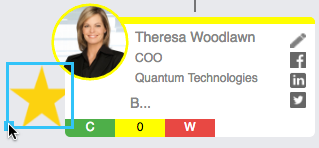
Edit images
-
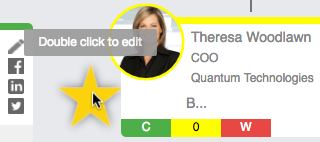
Double-click the image on the map, or highlight the image and click Actions > Edit from the left side menu.
-
Edit the sensitivity and select if the image is locked in place.
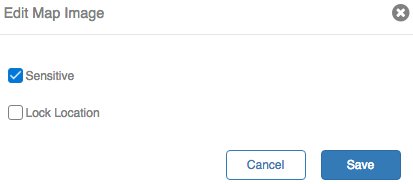
- Click Save.
Map templates are useful if your company needs to use the same basic map structure within different records. For example, a generic map template may be configured to show all of your companies products or services . Each time you need to create a product map for an account, you may select the template to give you a starting point and create consistency among your records.
Adding map templates is the same for all map types except team maps (not available). Templates may only be added while a map is in edit mode.
- Click the Tools icon (
 ) in the left side menu of an open map while no map item is selected.
 -
Click <Map Template>.

-
Select an available map template from the drop down list. An unlocked map template appears on the map along with any items already in place. A locked map template clears any existing items from the map.
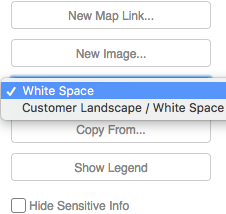
- Move, edit, and remove items on the map as usual unless the template is locked. Then, only edit the map card attributes.
Locked map templates
Locked map templates (generic map types) are unable to be edited except for map card attributes. A "Template Locked" notifications appears in the top right corner if the template is locked.
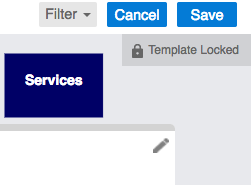
If the template is updated by a Revegy administrator, then the locked template on the map automatically updates.
The "Copy From" feature is helpful for using existing maps as starting points for new maps that are the same type (contact, issue, strategy, generic, or team). The existing map's data is copied to the new map.
The "Copy From..." option is the same for all map types. This feature may only be used while a map is in edit mode.
- Click the Tools icon (
 ) in the left side menu of an open map while no map item is selected.
 -
Click Copy From....

-
Select a record to view maps available to copy.

Note: Search "%%" to show all available accounts, opportunities, or partners. Click the parent record name to drill down to related opportunities. 
-
Select the map to copy from the "Maps Available to be Copied" section.
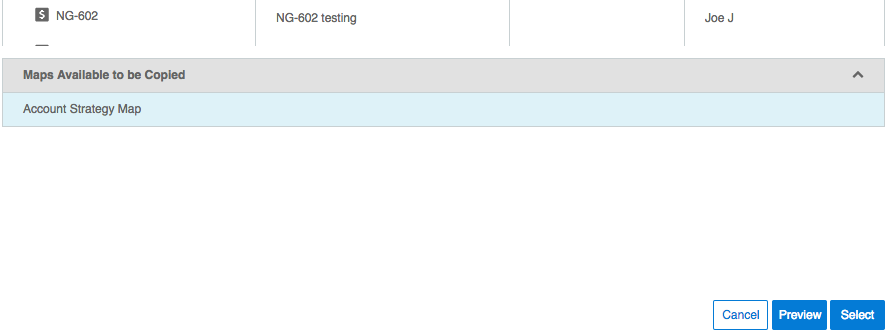
- (optional) Click Preview to verify the selected map is the correct map. Click Done after viewing the preview.
-
Click Select. The new map items are added to the currently open map and may be edited as usual.

Note: All map items are copied except map links, map card attributes that display on cards, and contact and team member cards that do not exist on the record you are working in. 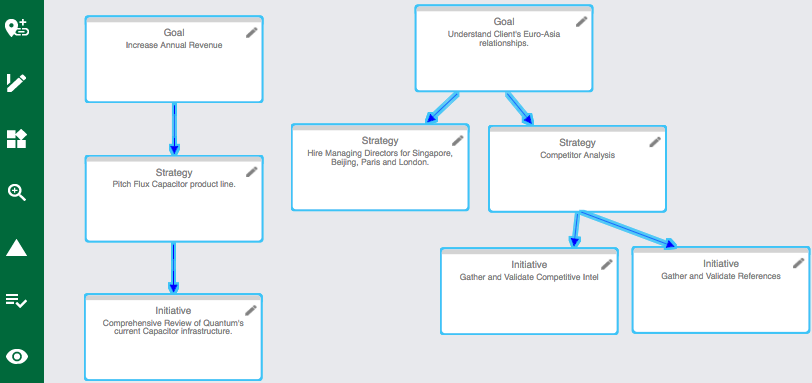
Map legends are useful reminders of how each map is configured. Use the map legend to view all attribute options and how they are placed on map cards. Predefined lines are also listed at the bottom of the legend.
The Show Legend option is the same for all map types. This feature is available in both view and edit mode.
- To view the attributes while in the map, hover over the attribute at the bottom of the map card to view full details.
- To view the map legend, click the Tools icon (
 ) in the left side menu of an open map while no map item is selected.
 -
Click Show Legend.

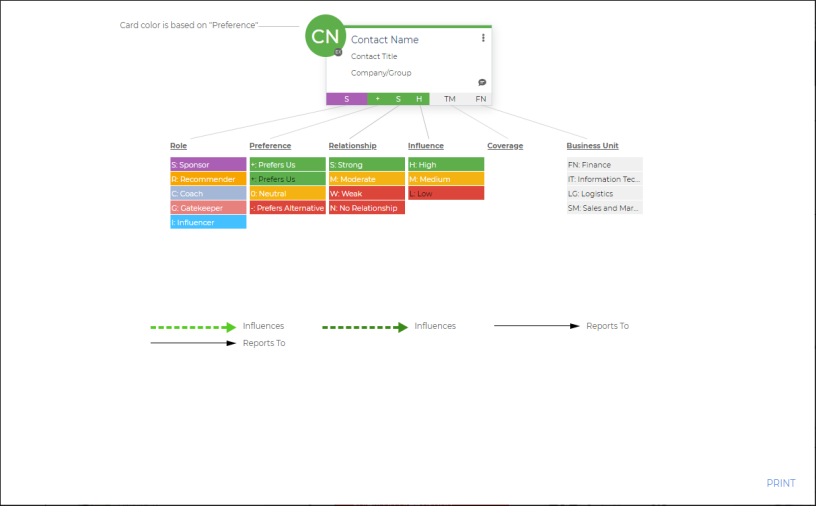

Note: The "Marketing Level" attribute is one of six customizable attributes the admin can manage. The titles and colors can be set to a specific preference. - (Optional) Click Print to print the map legend to PDF.
- Click Close to close the map legend pop-up.
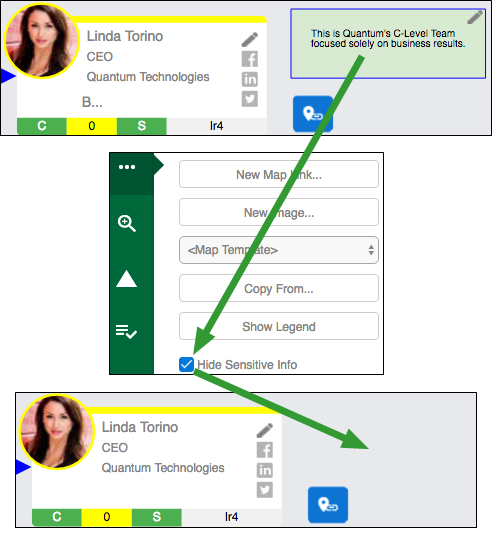
Hiding sensitive information is useful when presenting maps to customers or partners. For example, if you create a map that includes several internal comments and notes, you can hide this sensitive information so that a potential customer or partner cannot see your comments while you are presenting the map to them.
Map card attributes (if marked by a Revegy administrator), predefined lines (if marked by a Revegy administrator), comments, shapes, and images may be marked as sensitive.
Hiding sensitive information is the same for all map types. This option is available in both view and edit mode.
- Click the Tools icon (
 ) in the left side menu of an open map while no map item is selected.
 -
Select or deselect Hide Sensitive Info to show/hide information.

It is important to place items on a map in an order or pattern that makes sense to you, your team, and customers. For example, contacts that work on the same team should be grouped in the same area on a contact map. Strategies and initiatives should be near the goals they are trying to reach on a strategy map.
Move individual map items
- Click and hold an item on the map. Use your mouse to drag the item to the appropriate location on the map.
- Click an item on the map. Use your arrow keys on your keyboard to move items slowly and deliberately to better align items.
Move multiple map items
- Click and hold as you drag your cursor around a group of items on the map. Each item the cursor touches is selected. Use your mouse or arrow keys on your keyboard to move items together as a group.
- Click the Actions icon (
 ) in the left menu, then click Select All to highlight all items on the map and move them together as a group.
 - Hold the "control" key (Windows) or the "command" key (Mac), then select each item you want to move. After the items are selected, move them around the map as a group.
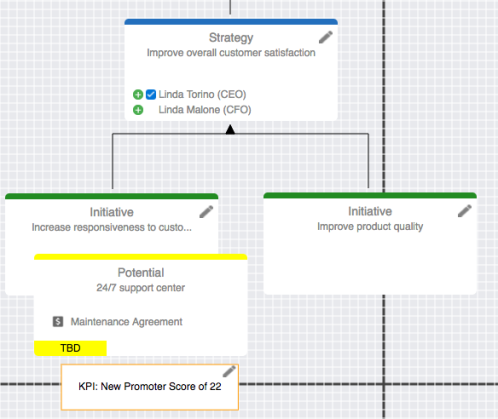
Page break lines give you visibility to how printed and archived maps look. Thick, dashed lines indicate the page breaks. Cards, items, and lines that cross the page break lines are broken, or split, between two PDF pages. To ensure cards and items are not split, place them on either side of the thick, dashed lines instead of across them.
Edit multiple comments
-
Select multiple comment cards.

-
Click the Tools icon (
 ) in the left side menu.
-
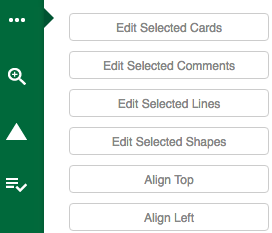
Click Edit Selected Comments. The "Edit Comment Card" pop-up opens.
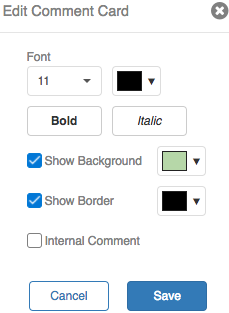
- Select and edit attributes for the comment cards, such as font, style, colors, and sensitivity.
- Click Save. The comments on the map are updated.
Edit multiple lines
-
Select multiple lines.

-
Click the Tools icon (
 ) in the left side menu.
-
Click Edit Selected Lines. The "Edit Map Link" pop-up opens.
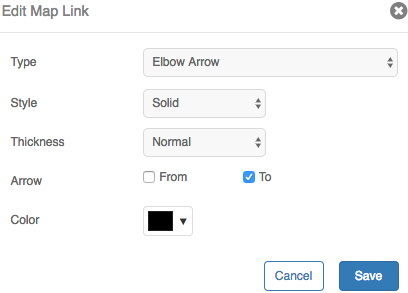
- Select and edit attributes for the lines, such as type, style, and color.
- Click Save. The lines on the map are updated.
Edit multiple shapes
-
Select multiple shapes.

-
Click the Tools icon (
 ) in the left side menu.
-
Click Edit Selected Shapes. The "Edit Map Shape" pop-up opens.
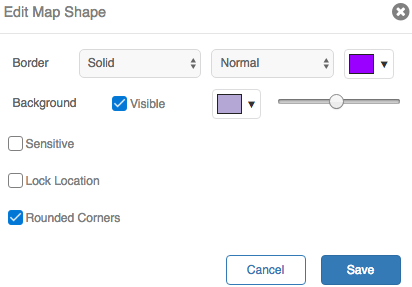
- Select and edit attributes for the shapes, such as colors and sensitivity.
- Click Save. The shapes on the map are updated.
Aligning map cards with one another creates clean, easier-to-view maps. You can align map cards horizontally or vertically. To align map cards, the map must be in edit mode.
-
Select multiple map cards and comment cards that should be aligned.
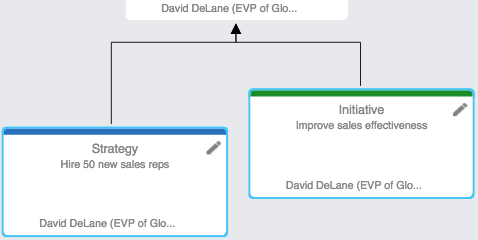
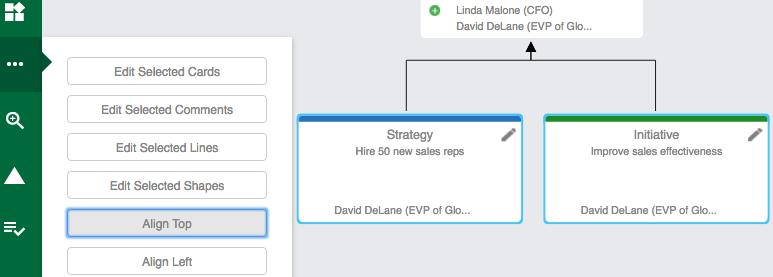
- Click the Tools icon (
 ) in the left side menu of an open map.
 -
Click Align Top or Align Left. The selected cards automatically align with each other.
Undo map changes
To undo map changes, the map must be in edit mode. Changes cannot be undone once the map is saved.
To undo previous map changes, click the Actions icon (![]() ), then click Undo. You may also use Control+Z (Windows) or Command+Z (Mac) on your keyboard.
), then click Undo. You may also use Control+Z (Windows) or Command+Z (Mac) on your keyboard.
Map changes that may be undone include:
- Adding, moving, and deleting map cards and comments
- Updating card attributes that are not contacts or team members
- Adding, moving, editing, and deleting lines
- Adding, moving, editing, resizing, and deleting shapes and images
- Adding, moving, updating, and deleting map links
Map changes that may NOT be undone include:
- Adding, updating, and deleting contact details (such as name, email, phone, etc.)
- Adding, updating, and deleting team member details (such as name, role, etc.)
- Zooming in and out
- Updates to the map attributes (such as name, shared indicator, and completeness indicator)
Redo map changes
To redo map changes, the map must be in edit mode. Changes cannot be redone once the map is saved.
To redo previous map changes, click the Actions icon (![]() ), then click Redo. You may also use Control+Y (Windows) or Command+Y (Mac) on your keyboard.
), then click Redo. You may also use Control+Y (Windows) or Command+Y (Mac) on your keyboard.
Map changes that may be redone include:
- Adding, moving, and deleting map cards and comments
- Updating card attributes that are not contacts or team members
- Adding, moving, editing, and deleting lines
- Adding, moving, editing, resizing, and deleting shapes and images
- Adding, moving, updating, and deleting map links
Map changes that may NOT be redone include:
- Adding, updating, and deleting contact details (such as name, email, phone, etc.)
- Adding, updating, and deleting team member details (such as name, role, etc.)
- Zooming in and out
- Updates to the map attributes (such as name, shared indicator, and completeness indicator)
Copy, cut, and paste options can help save valuable time and effort by allowing items to be quickly duplicated or moved within a single map or like map types (i.e. contact to contact, team to team, etc).
Different items may be copied, cut, and pasted depending on the map type. For all map types, while in view mode items may only be copied; however, in edit mode items may be copied, cut, and pasted.
-
Select one or more map items. The listed items that may be copied for each map type is listed in the table below.

Note: To select multiple map items, you may click and drag your mouse around a grouping of items or hold down the "control" (Windows) or "command" (Mac) key on your keyboard and click each item you need to cut or copy. Map Type Items to Copy, Cut, Paste Contact Placeholder cards, comment cards, shapes, images Strategy Item cards, project cards, comment cards, shapes, images Issue Item cards, solution cards, comment cards, shapes, images Generic Item cards, comment cards, shapes, images Team Comment cards, shapes, images 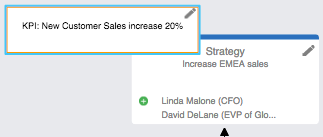
- Click the Actions icon (
 ) in the left menu.
 -
Click Copy or Cut. "Cut" removes the item from the map. Use the "Undo" option in the Actions menu to restore your cut data.
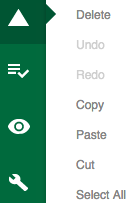
- In another map, click the Actions icon (
 ) in the left menu.
 -
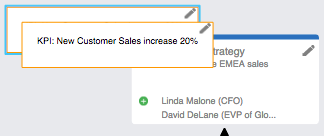
Click Paste. The selected item is added to the map.
-
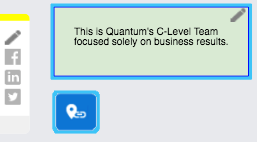
Select one or more items on the map.
- Click the Actions icon (
 ) in the left menu.
 - Click Delete. You may also select the "Delete" key on your keyboard.
|
|
Note: Before saving the map, use the "Undo" and "Redo" options in the Actions menu if you accidentally delete items. |
Auto save helps ensure that map changes are saved after a selected amount of time without a user needing to manually save after each change. Auto save applies to all maps per user. If you select "10 minutes" for auto save, then all account, opportunity, partner, and portfolio/territory maps auto save after 10 minutes.
Auto save is the same for all map types. This option is available in both view and edit mode.
- Click the Settings icon (
 ) in the left side menu of a map.
 -
Click the "Auto Save" drop down menu.
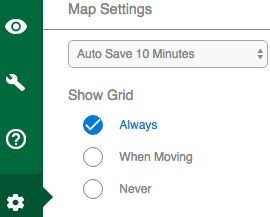
- Select an auto save option (off, 5 minutes, 10 minutes, 15 minutes) to determine the length of time that passes before the map is automatically saved.
If enabled by a Revegy administrator, you have the ability to show or hide map grid lines on the map. Map grid lines assist you in creating cleaner maps, allowing you to better align cards and other items, such as shapes.
Grid lines are the same for all map types. This option is available in both view and edit mode.
- Click the Settings icon (
 ) in the left side menu of a map.
 -
Select an option from the "Show Grid" section.
- Always: The grid lines always display on the map.
- When Moving: The grid lines only appear on the map when you move a map card or item around on the map. The grid lines disappear when you release the item.
- Never: The grid lines do not display on the map.
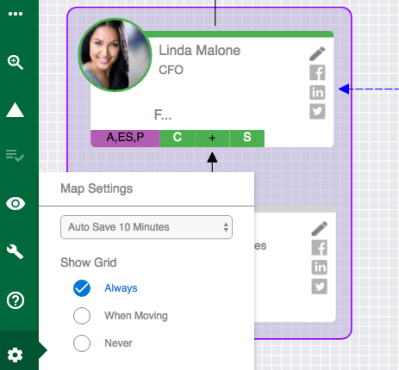
- (if enabled) Better align your map cards and items using the grid lines.