Maps
Maps provide a visual representation of relationships, goals, issues, risks, teams, processes, and more.
Use maps to:
- Visualize where you have cross-sell opportunities in key accounts and where competition is established
- Gain a visual picture of key stakeholders inside and outside your accounts
- Identify friends and enemies
- Document your customer's key business strategies, initiatives, and challenges
Five different map types exist.
| Map Type | Description |
|---|---|
| Contact |
|
| Strategy |
|
| Issue |
|
| Generic |
|
| Team |
Used to present information about a team working on an account or opportunity |
- Navigate to portfolio/territory, an account, opportunity, or partner.
-
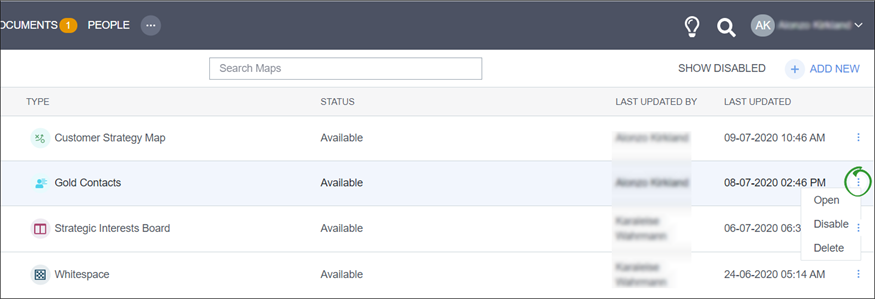
Hover over the "Maps" drop down list from the main top navigation menu, and click View Map List.
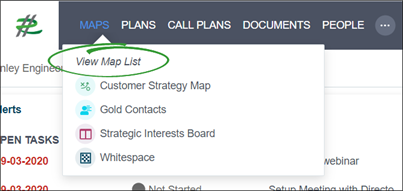
An example of the map list is below.

- Name: User-given name of the map
- Type: Map configuration used to create the map
- Status: Indicates if the map is available to edit or who is editing it if it is checked out
- Last Updated By: Name of the person who last updated the map
- Last Updated: Date and time of the last update
-
Click on any column header to sort the list by descending or ascending order.
- Use the "Search Maps" function above the maps list to filter maps.
- As you type your criteria, the list filters.
- You can only search by a map name.
Disable maps
Disabled maps do not display in the map list or map drop down list.
-
Open the ellipsis (far right) of the appropriate column.
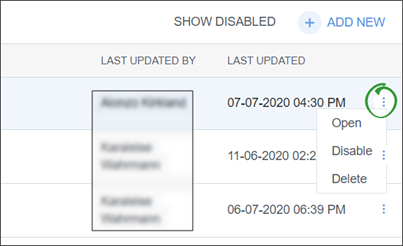
- Select Disable to disable the map.
Enable maps
Enabled maps display in the map list and map drop down list.
- Click the Show Disabled button to display disabled maps.

-
Open the ellipsis (far right) of the appropriate column.

- Select Enable to enable the map.
-
Click Add New in the map list.

-
Enter and select the map attributes, including the Map Type, Map Template (not available for team maps), Map Name, and Related Contact Map (for strategy and issue maps).
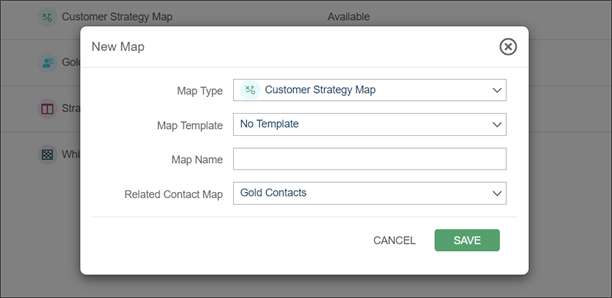
- Click Save. The new map opens with a blank canvas.
Required maps are map configurations that are essential to the success of your accounts, opportunities, partners, and portfolio/territory.
Required maps display in the map drop down menu and are marked with "NEW" in orange. An orange number indicator appears beside the "Maps" drop down header.
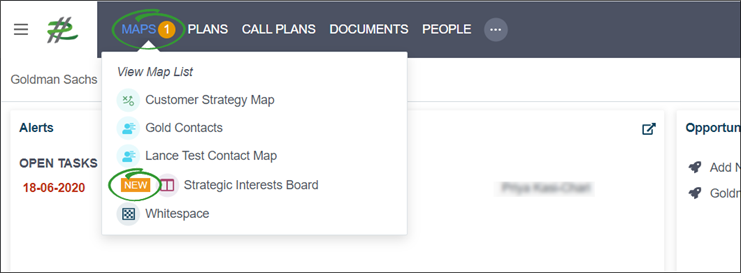
- They are only indicated as required before they are created.
- Click a required map in drop down list to quickly create a map using the required configuration.
- Once a required map is created, the indicators are removed unless the maps are deleted.
- If no map using the required configuration exists within your record, the required indicators are re-added.

- Hover over the row of the desired map in the map list. The row will be highlighted.
- Click on the row to open the map.
|
|
Note: Hover over the "Maps" drop down menu, then select a specific map to open it without viewing the map list. |
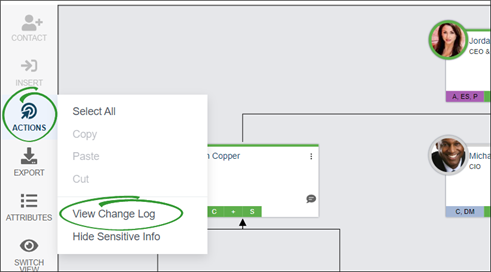
- Open the Actions menu.
- Select View Change Log.
|
|
Note: Hover over the "Maps" drop down menu, then select a specific map to open it without viewing the map list. |
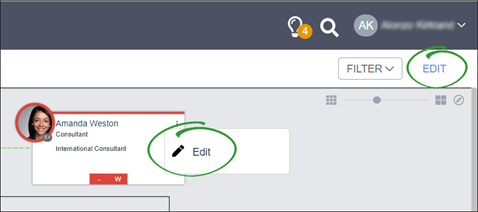
To make changes to a map, it must be in edit mode. Edit mode can be accessed in two ways:
- Hover over a card to reveal an option to Edit
- Click Edit in the top right corner of the map
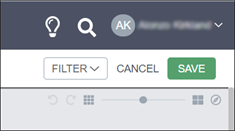
When you are finished with your changes, click Save in the top right corner of the map to put the map into view mode. You may also click Cancel to revert back to the previous version of the map before you entered edit mode.
The map attributes menu may have different available options depending on your company's administrative configuration.
- Click the Attributes icon (
 ) in the left side menu.
 -
Rename the map in the Name field.
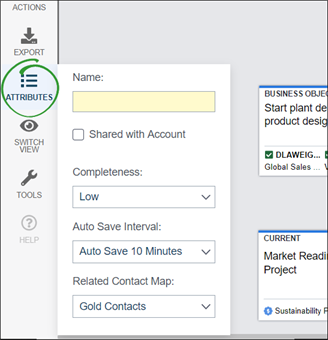
- (if enabled) Select or deselect "Shared with Account." This option is used in the coaching report.
- (if enabled) Select the level of completeness that best describes the map in the "Completeness" drop down list. For example, if the map has just been created and has many gaps, then mark the "Completeness" as "Low." This option is used in the coaching report.
- (Issue and Strategy maps only) Select a new contact map to relate the selected map to in the "Related Contact Map" drop down list. Click OK to the prompt to accept the change and remove all "Who Cares/Leader/Influencer" information from the map.
Revegy Maps are viewable as a map, list, and grid, or word cloud. Each map type offers different viewing options.
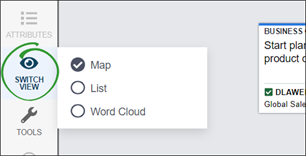
Use the Switch View icon to open the menu. Click each view to switch between them.
- Map: Displays the map in the full visual form with cards, comments, lines, and shapes
- List: Displays a list of added cards and card details in a table format
- Grid: (contact maps only) If enabled, plots contacts on a grid based on selected criteria
- Word Cloud: Displays the words/terms appearing in the map; words appearing more frequently are enlarged (example below)

If configured, Revegy tools (individual plan objects, plans, call plans, and other maps) may be attached to a map. This allows you to open and edit these tools directly from a map instead of navigating away to a different section of Revegy.
-
Click on the Tools in the left side of an open map.
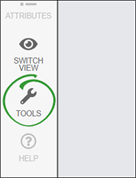
-
Click the icon to open the tool(s).
- If only one tool is attached, then the tool opens in a split-screen view.
-
If multiple tools are attached, the "Select Tool" table opens.
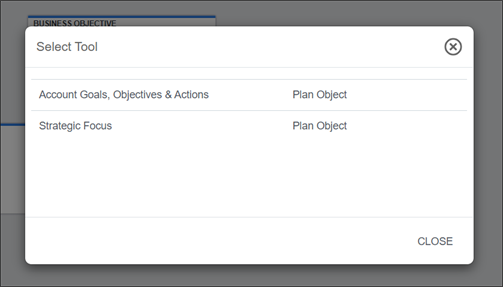
- (if multiple tools are attached) Click a tool from the "Select Tool" table to open the tool in a split-screen view.
-
Edit the Revegy tool as you normally would and save any changes. Close the tool by dragging the center ellipsis to the right of the screen.
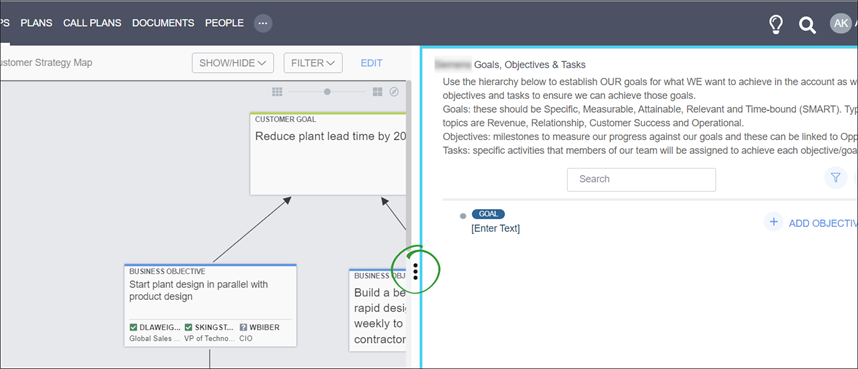
Split Screen view is available for use with maps and their attached tools. In order to use Split Screen, it must first be activated from the Revegy Admin Module [System Preferences].
With Split Screen active, you can view and edit maps and their associated tools at the same time. To use this feature, first select a map with tools attached.
Then click on the More Tools icon (![]() ) to select another item to be viewed alongside the current map. The tool will automatically be displayed on the right-hand side of the screen. Now you can proceed to make changes
as you would normally. The screen that is currently active for editing will be highlighted in blue.
) to select another item to be viewed alongside the current map. The tool will automatically be displayed on the right-hand side of the screen. Now you can proceed to make changes
as you would normally. The screen that is currently active for editing will be highlighted in blue.
For example, in the screenshot below, the right side is currently active.
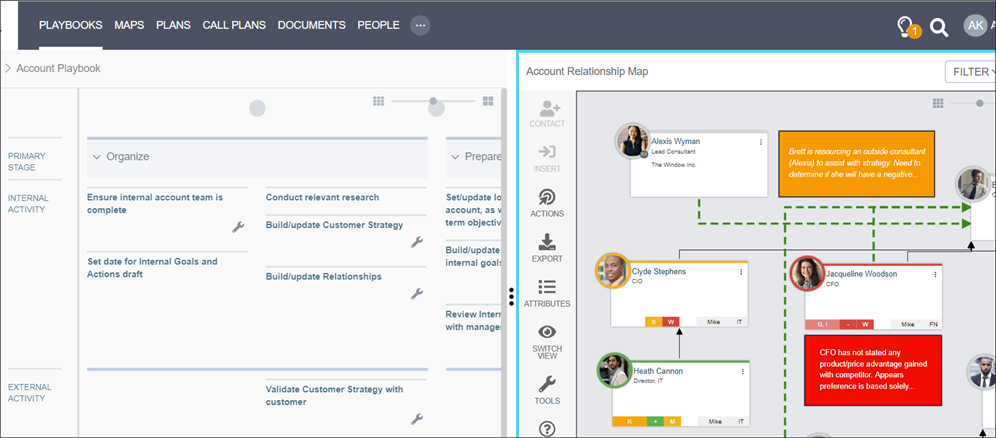
To exit Split Screen mode, drag the ellipsis (![]() ) to the far right to close out the right-hand side information or to the far left to close out the left-hand side information.
) to the far right to close out the right-hand side information or to the far left to close out the left-hand side information.
Additional resources and help links may be attached to a map. These resources provide you with supplementary information and tools, for example, a video, a template, or a quick reference guide.
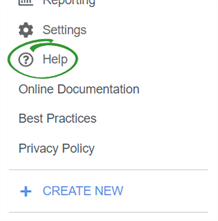
- Click the Help icon (
 ) in the left side menu of an open map.
 -
Click an option in the Help menu.
The display behavior of a website or a document is determined by your browser settings. For example, a website may open in a new browser tab or window.
- Online Documentation: Link to Revegy's online help, replete with a glossary and index
- Best Practices: Link to recommended best practices for use of Revegy
- Privacy Policy: Statement regarding Revegy's use of data
Maps are printed to PDF. The PDF opens in a new internet browser window/tab so that you may save the PDF wherever you need.
|
|
Note: All three map views (map, list, grid) may be printed. |
- Open the ellipsis in the menu bar.
-
Click Reports.

-
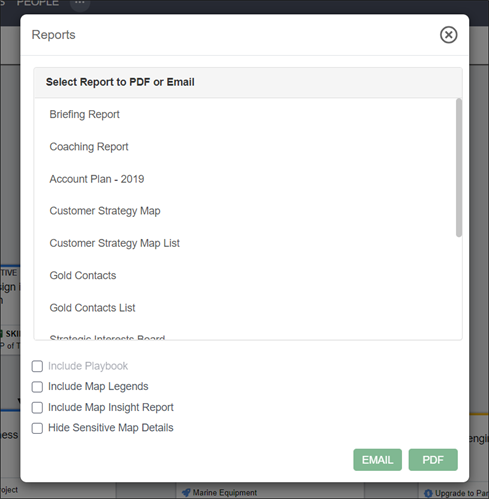
Select the appropriate map. Include any or all of the desired supplementary pieces.
-
Select Email of PDF.
- Email: The selected document will be downloaded as a PDF and attached to an email template
- PDF: The selected document will be downloaded as a PDF
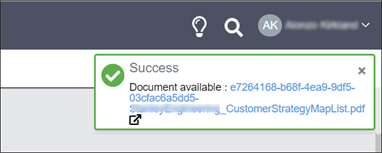
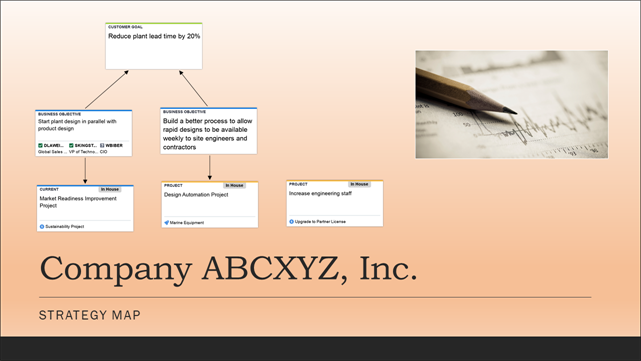
Maps are exported as Microsoft PowerPoint presentations. The presentations save and download to the destination you have selected your internet downloads to be stored.
|
|
Note: Only map and list view may be exported. List view exports as a .csv file. |
- Click the Export icon (
 ) in the left side menu of an open map.
 -
Select the desired medium.
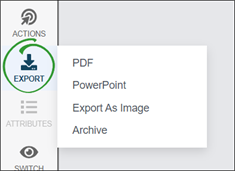
Note: The PowerPoint export downloads the map with a transparent background, enabling the map to be applied to any customized PowerPoint template
-
(optional—map view only) Select to include any or all of the supplementary pieces.
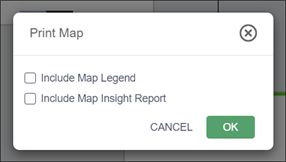
Option Details PDF Downloads map in PDF format PowerPoint Downloads map with transparent background, enabling the map to be applied to any customized PowerPoint template Export As Archive Downloads map as a PNG file type Include Map Legend Includes the map legend in the PDF download Include Map Insight Report Only available for contact maps. Displays map attributes for each contact that has been added to any contact map for the selected record
- Click OK. The map saves and downloads as a PowerPoint presentation.
Maps are archived as PDFs and stored in the "Documents" section for the currently viewed record.
Archiving is helpful for taking snapshots of major changes and progress within your accounts and opportunities.
|
|
Note: Only map view may be archived. |
-
Click the Export icon (
 ) in the left side menu of an open map.
 - Select Archive.

-
(optional—map view only) Select to include any or all of the supplementary pieces.
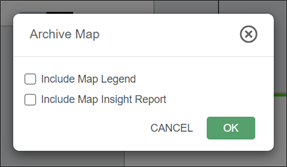
Option Details Include Map Legend Includes the map legend in the PDF Include Map Insight Report Only available for contact maps and displays map attributes for each contact that has been added to any contact map for the selected record
- Click OK. The map saves as a PDF in the "Documents" section for the currently viewed record as "[Map Name] [Current Date and Time]."

|
|
Note: Deleting a map is permanent. It is recommended to archive the map before deleting it. |
- Hover over the "Maps" drop down list from the main top navigation menu, and click View Map List.

-
Open the ellipsis (far right) of the appropriate column. Select Delete.
